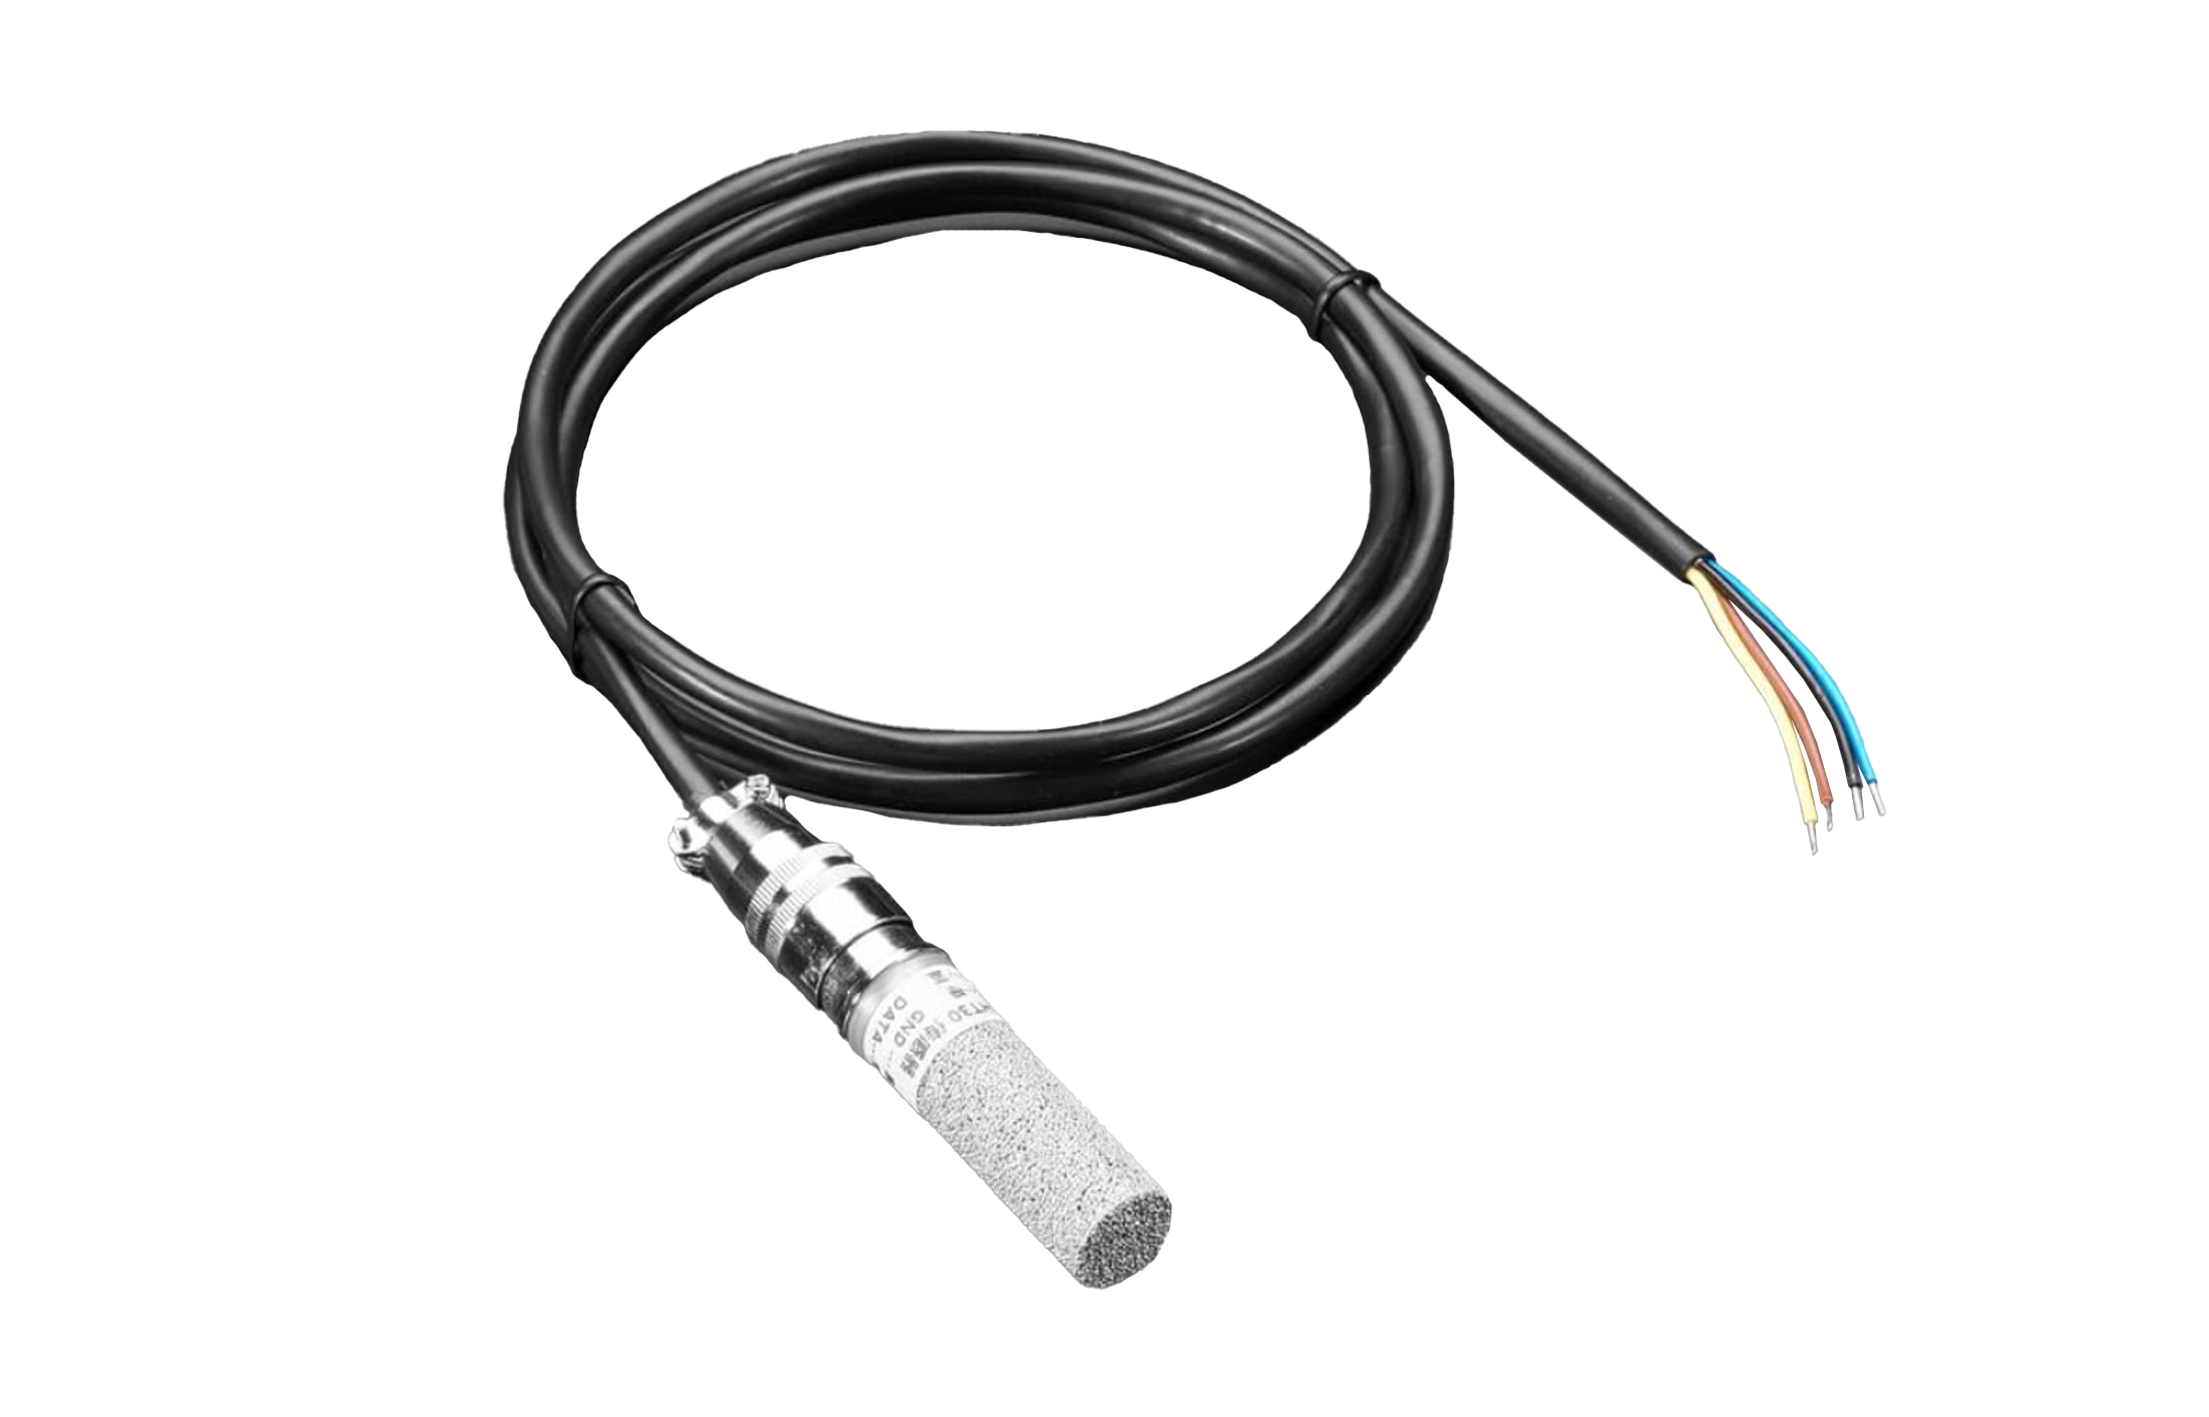
Temperature and Humidity Sensor with ModBus
User Manual

Temperature and Humidity Sensor with ModBus

SKU: PP-THMODBUS
1. Dimensions

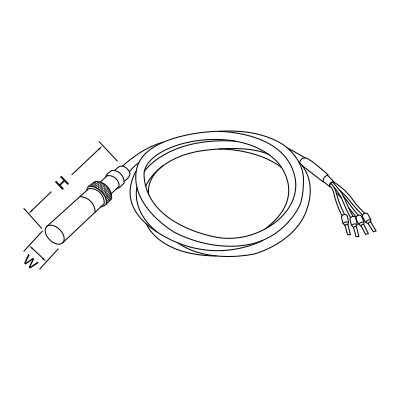
Image
  • W: 14 mm
  • H: 87 mm

2. What you need

Wired. Needs a PIERRE PRO or LITE Controller with free RS485 (A+, B−) terminals, plus the Temperature and Humidity Sensor with ModBus and a TTL converter.
3. Wiring

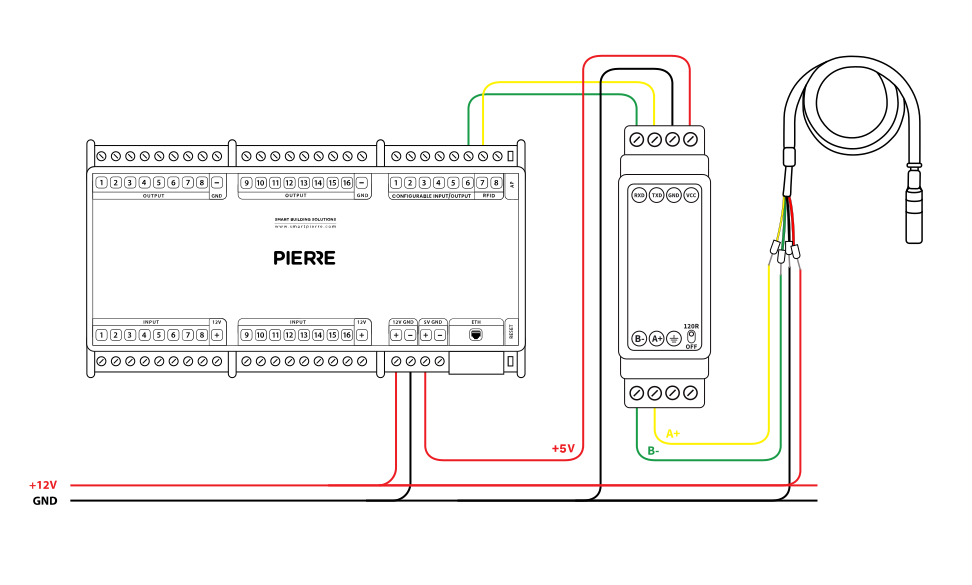
Image
  • Connect the TTL converter’s VCC terminal to the +5 V output of the PIERRE controller.
  • Connect the TTL converter’s GND terminal to the 5V GND terminal of the controller.
  • Connect the A+ terminal on the TTL converter to the A+ (RS485) terminal on the controller.
  • Connect the B− terminal on the TTL converter to the B− (RS485) terminal on the controller.
  • Connect the sensor’s VCC wire to the TTL converter’s VCC terminal.
  • Connect the sensor’s GND wire to the TTL converter’s GND terminal.
  • Connect the sensor’s TXD wire to the RXD terminal on the TTL converter.
  • Connect the sensor’s RXD wire to the TXD terminal on the TTL converter.
     
Run Wires Cross-section Cable type Conductors
From TTL converter to PIERRE Controller 4 0.2 mm² (24 AWG) Cat 5 U/UTP +5 V, GND, A+, B−

Connections

  1. Connect the TTL converter’s VCC terminal to the +5 V output of the PIERRE Controller.
  2. Connect the TTL converter’s GND terminal to the 5 V GND terminal of the Controller.
  3. Connect the A+ terminal on the TTL converter to the A+ (RS485) terminal on the Controller.
  4. Connect the B− terminal on the TTL converter to the B− (RS485) terminal on the Controller.
  5. Connect the sensor’s VCC wire to the TTL converter’s VCC terminal.
  6. Connect the sensor’s GND wire to the TTL converter’s GND terminal.
  7. Connect the sensor’s TXD wire to the RXD terminal on the TTL converter.
  8. Connect the sensor’s RXD wire to the TXD terminal on the TTL converter.

One run, four conductors: 5 V, ground and the RS485 pair A+ and B−, on a single Cat 5 U/UTP cable. Maximum length 100 m. Do not run the data cable alongside high-voltage cable.
4. Sensor setup via App

Image
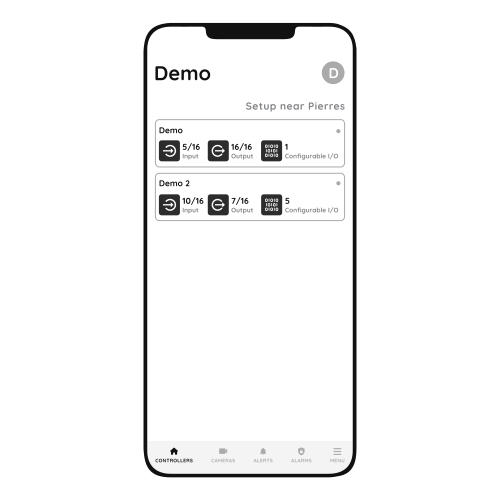
  1. Choose Controller
    1. Tap on the Controller that you would like to add new I/O to.
    2. To edit the I/O, click on the Controller to which the I/O is added.
Image
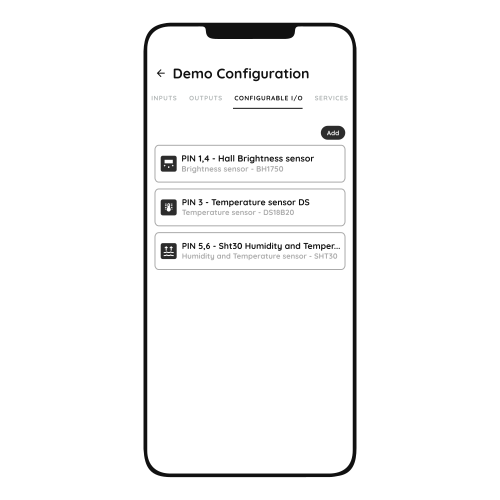
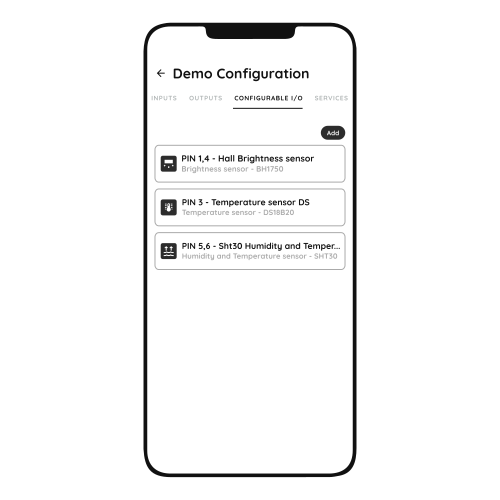
  1. Configurable I/O - list
    1. Tap on the Configurable I/O tab.
Image
  1. Add button - Configurable I/Os
    1. Tap on the Add button.
Image
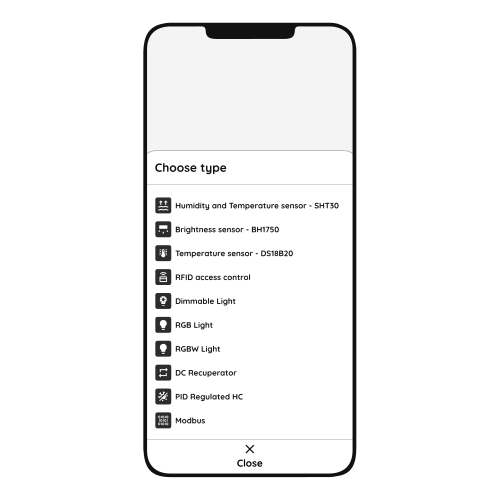
  1. Choose type - Configurable I/O list
    1. You should choose the type of the I/O from the list that you would like to add.
Image
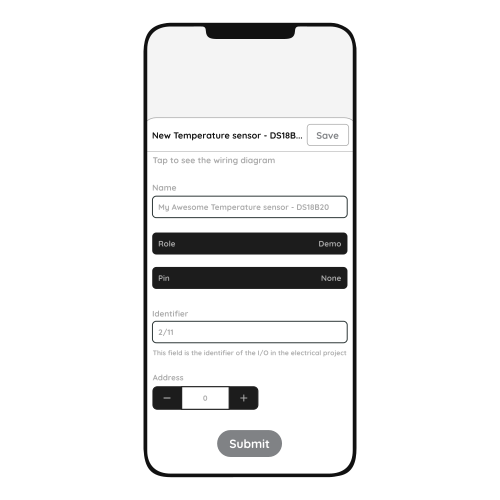
  1. New Temperature sensor - DS18B20
    1. Fill the following form:
      1. Name - Write the name of the Temperature sensor.
      2. Roles - Select the Role from the list.
      3. Pin -  Choose Pin. It is physical place on the Controller where I/O is connected to it.
      4. Identifier - Enter the identifier of the I/O in the electrical project in this field.
      5. Address - Tap on +/-.
    2. To confirm your choice tap Submit and Save.
Image
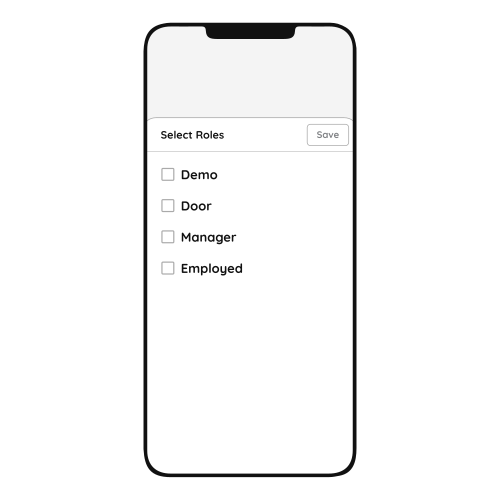
  1. Select Roles
    1. You can select desired Role or Roles - multiple choice if you tap on the checkboxes next to them.
    2. Tap on Save/Done.
Image
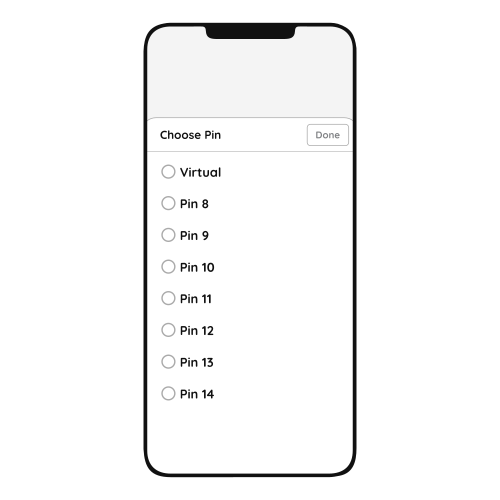
  1. Choose PIn
    1. Tap on the radio button next to the Pin that you would like to choose.
    2. To confirm selection tap on Save/Done.

5. FAQ

Q1: When should input and output be on the same controller?

If one input influences an output, both should be added to the same controller. A motion sensor triggering a lamp, for example, performs best when both sit on the same controller.

Q2: What are configurable IOs?

The Configurable I/O pins on the PIERRE Controller PRO carry digital sensor and control signals, for example the DS18B20 temperature sensor, the BH1750 brightness sensor and 0–10 V control.

Q3: Where should the sensor be installed?

At eye level, away from draughts and external walls.

Q4: How many sensors do I need?

At least one for basic heating or cooling control. In practice, one per zone or room where you want individual control.

Q5: Does it need calibrating?

Not always necessary, but often useful. Skip it if the sensor is factory-calibrated to ±0.5 °C or better, the application is ordinary comfort heating or cooling, and the mounting position is good. Calibrate if the reading disagrees with a reference thermometer, if the sensor sits where electronics, sunlight or poor airflow affect it, or if the system needs precise control. In the Smart PIERRE app calibration is optional — the offset is there so you can fine-tune it.