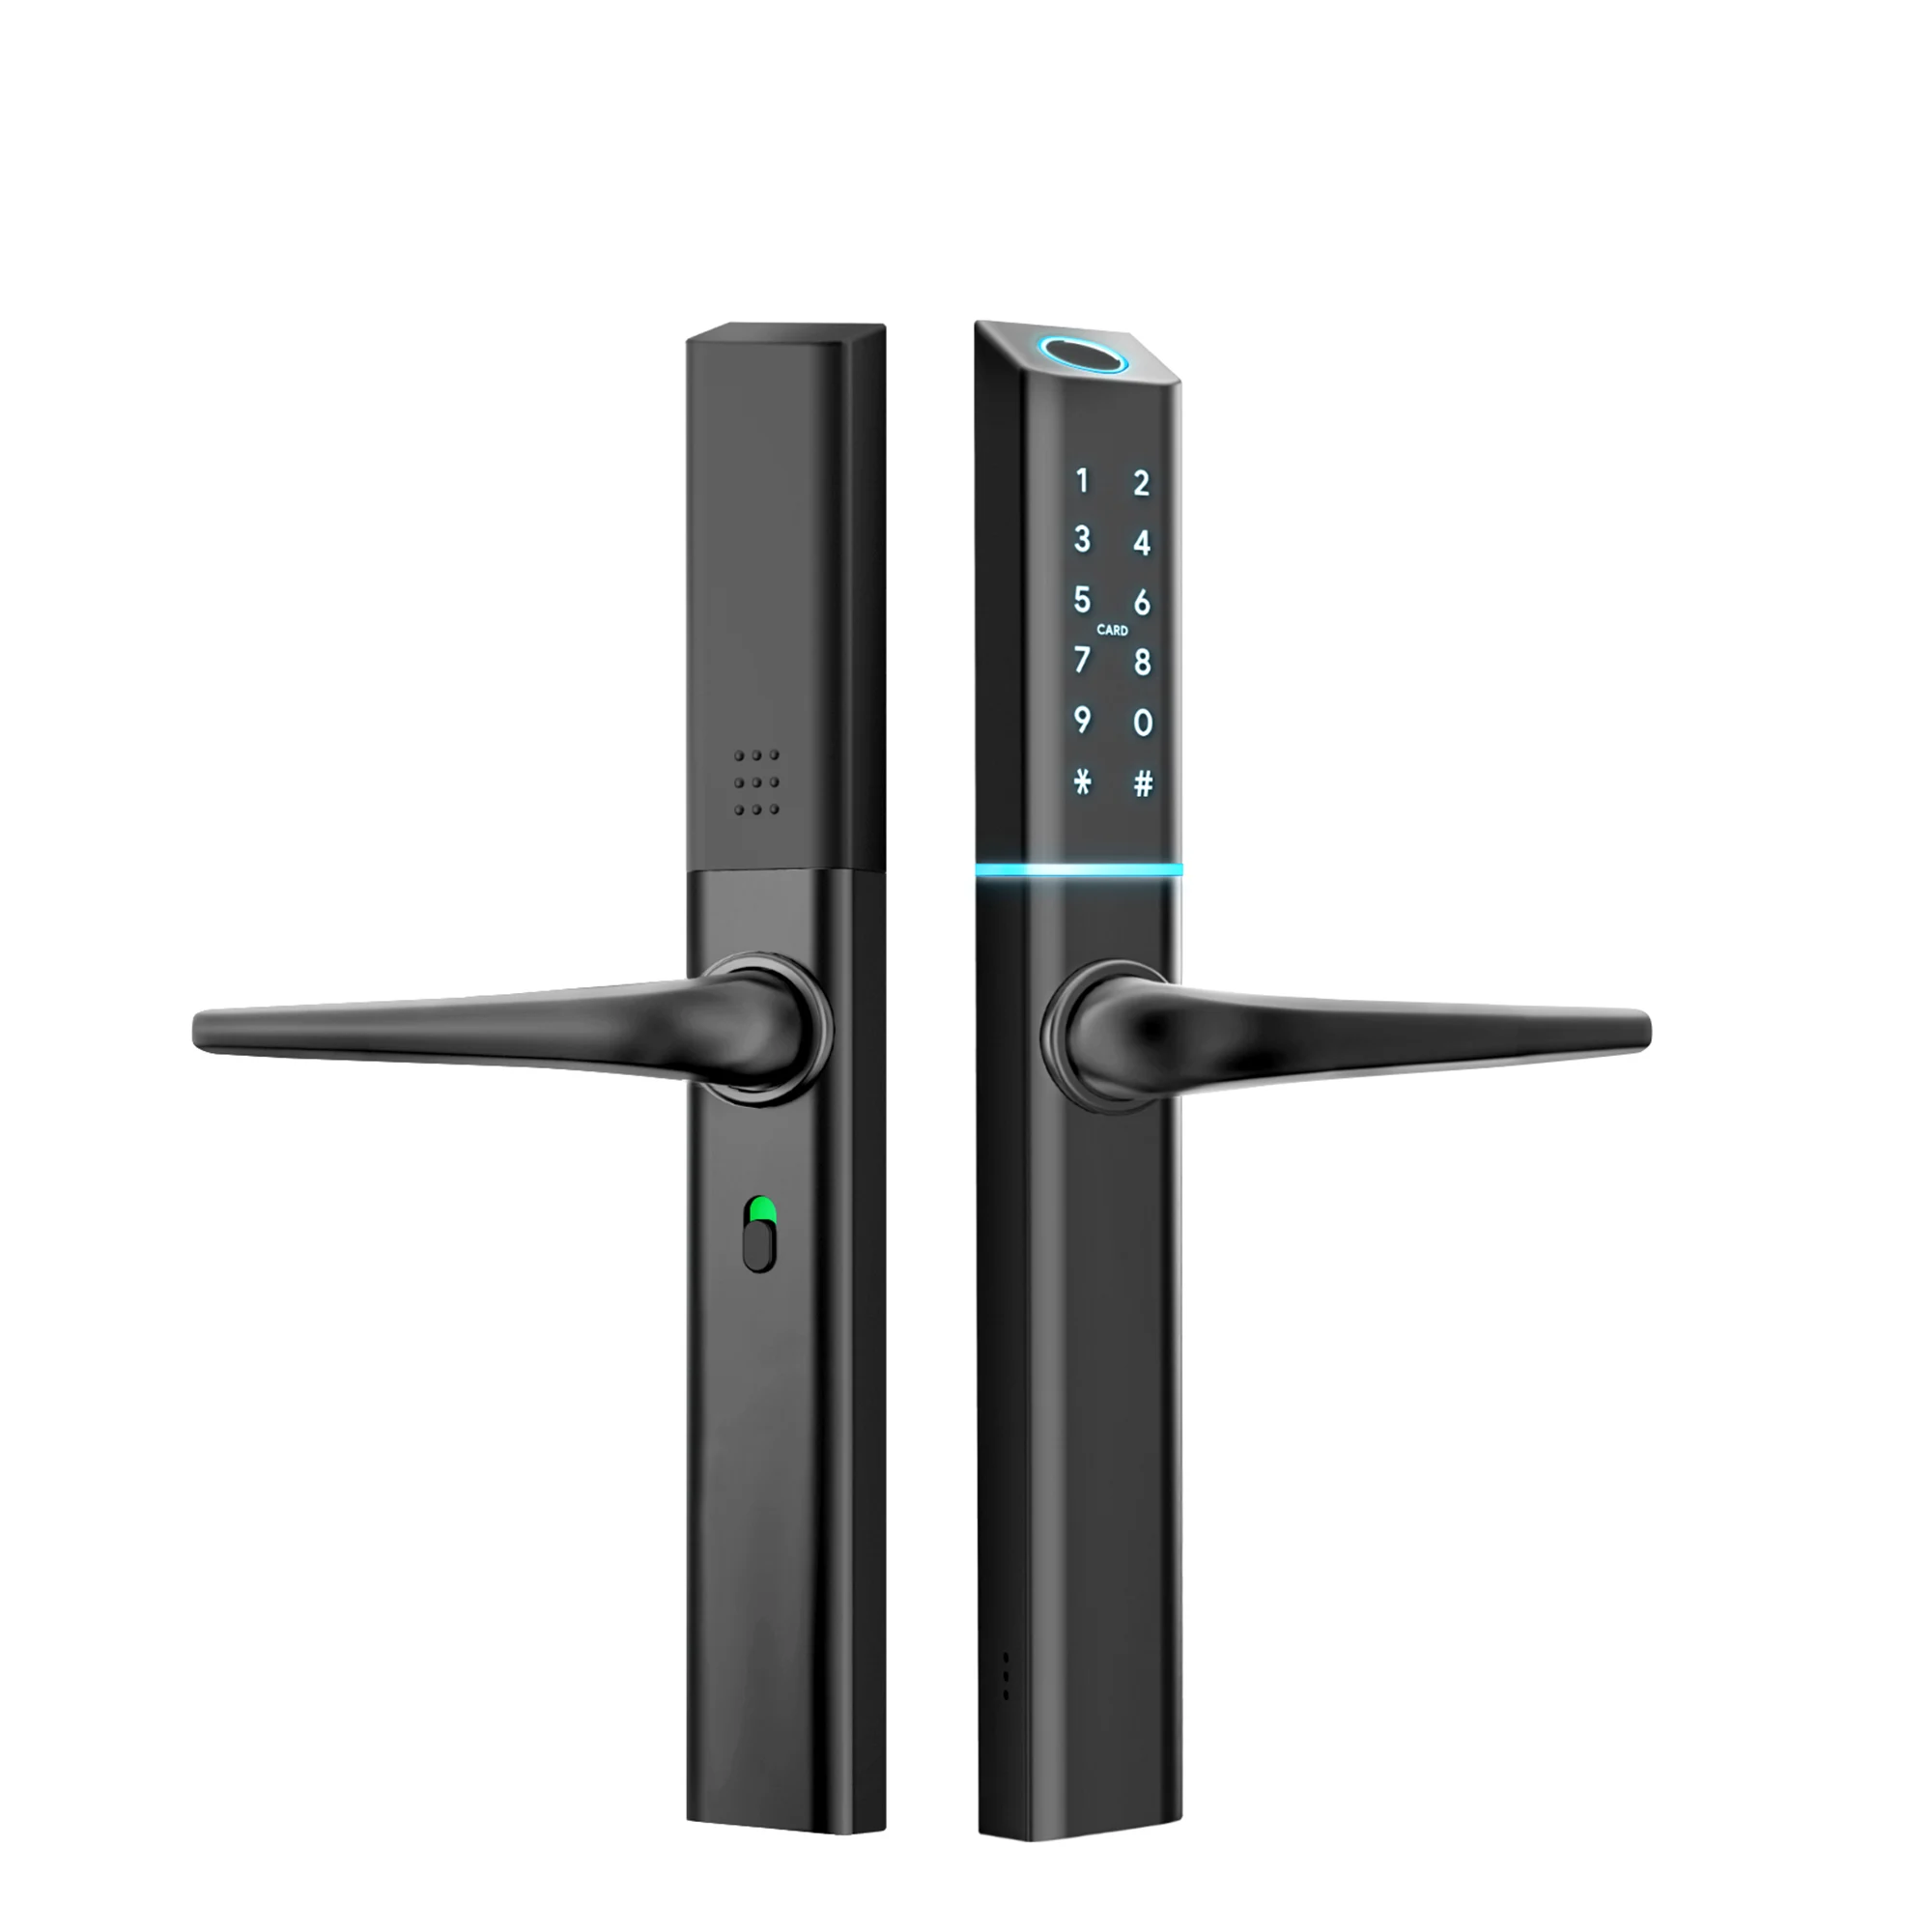
User Manual
PIERRE - Argus Smart Door Lock
SKU: PW-SDL-ARGUS
The PIERRE Argus Smart Door Lock is a smart mortise lock for wooden, security and composite doors from 35 to 65 mm thick. It opens with a fingerprint, a PIN code, a 13.56 MHz RFID card, the PIERRE application or the mechanical key.
The lock connects to a PIERRE display and/or gateway over PIERRE Wave (Zigbee 3.0, 2.4 GHz). PIN codes and RFID cards are managed as PIERRE tokens in the PIERRE application, and access follows each user's roles and time limits. The lock runs on batteries and warns when they are low.
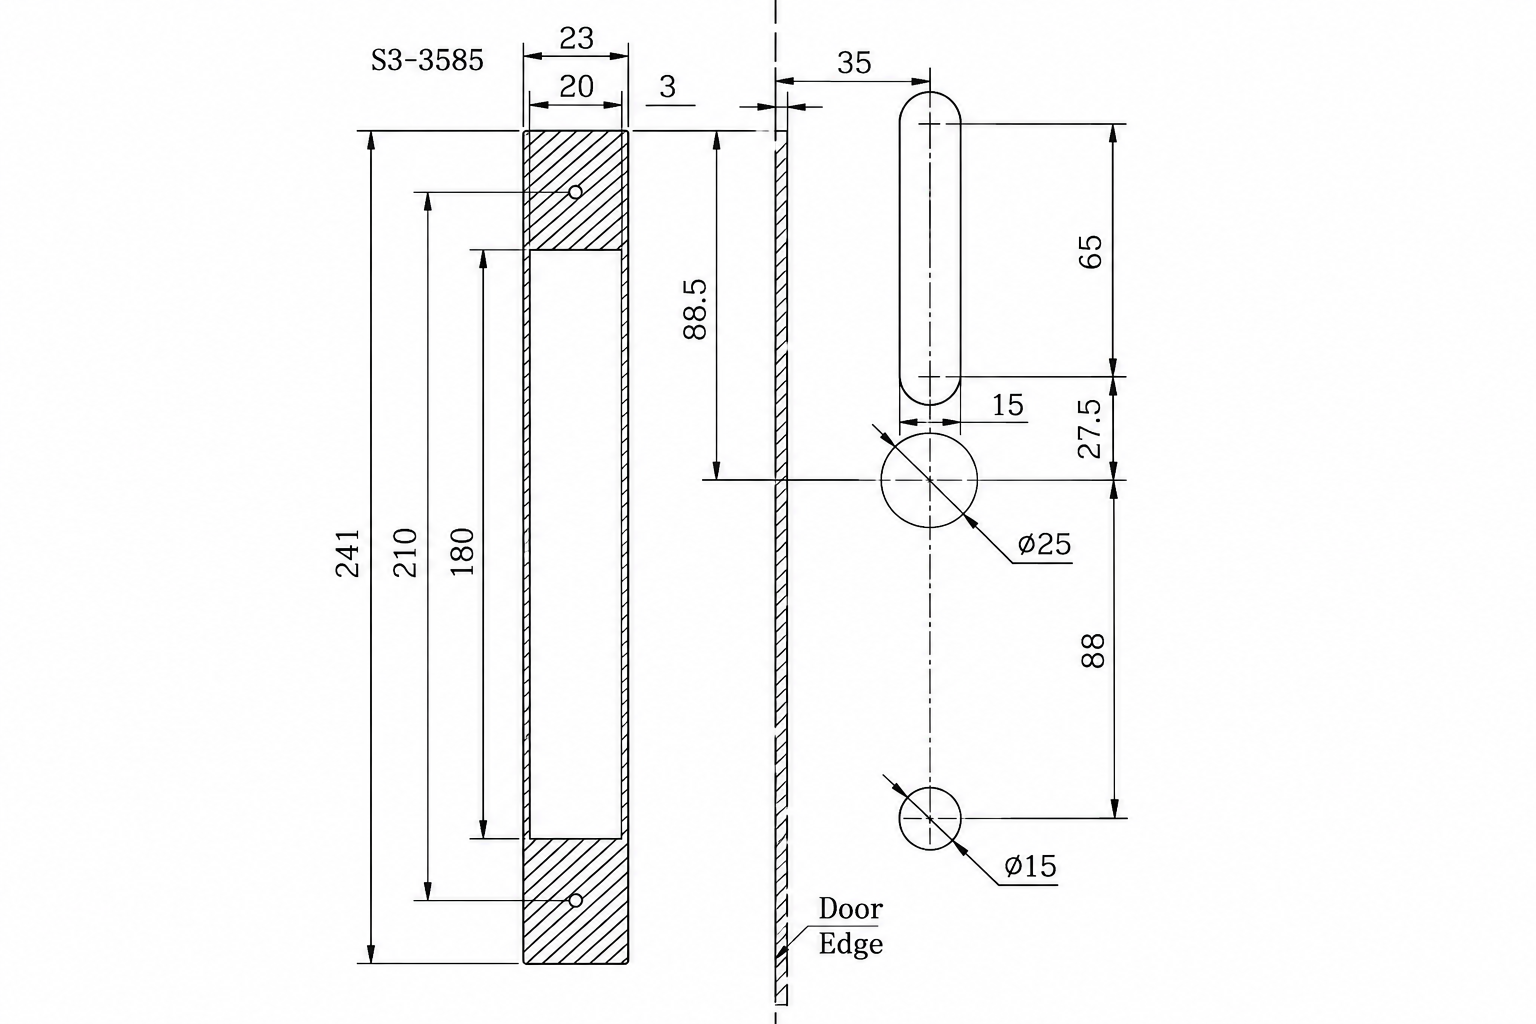
| Suitable for Mortise | 3592, 4592 (Double Hook), 6085, 6072, 2885 (Double Hook), 3585 |
| Door Types | Wooden, security and composite doors |
| Door Thickness | 35-65 mm |
| Battery Life | Up to 12 months |
| Power Supply | 4x 1.5V AA Battery (6V) |
| Operating Temperature | -25°C to +60°C |
| Operating Humidity | 0-95 % RH |
| Connectivity | Zigbee |
| Protocol | Zigbee |
| Safety Features | Anti-flammable housing |
| Low Battery Indication | Yes |
| Access Modes | Smartphone, RFID Card, PIN, Fingerprint, Mechanical key |
| User Capacity | Hardware: 1000, APP: 100 (255 card/PIN, 200 Fingerprint) |
| Card Reader Technology | 13.56MHz |
| Material | Aluminium alloy |
| Color | Black |
| NO | Name | Qty |
|---|---|---|
| 1 | Front Panel | 1 |
| 2 | Back Panel | 1 |
| 3 | Mortise | 1 |
| 4 | Cards | 3 |
| 5 | Mechanical Key | 2 |
| 6 | Spring | 1 |
| 7 | Hexagonal Wrench | 1 |
| 8 | User Manual | 1 |
| 9 | Striker Plate & Plastic Striker | 1+1 |
| 10 | Screw Stubs: M5×30mm | 2 |
| 11 | Screw Stubs: M5×35mm | 2 |
| 12 | Sliding Screws: M5×11mm | 1 |
| 13 | Mortise Screws: M5×10mm (For Aluminum Door) | 4 |
| 14 | Mortise Screws: M4×25mm (For Wooden Door) | 4 |
| 15 | M5×25mm Screw | 1 |
| 16 | M5×30mm Screw | 1 |
| 17 | M5×40mm Screw | 1 |
| 18 | M5×50mm Screw | 1 |
| 19 | M5×60mm Screw | 1 |
| 20 | 50mm Square Shaft | 1 |
| 21 | 57mm Square Shaft | 1 |
| 22 | 67mm Square Shaft | 1 |
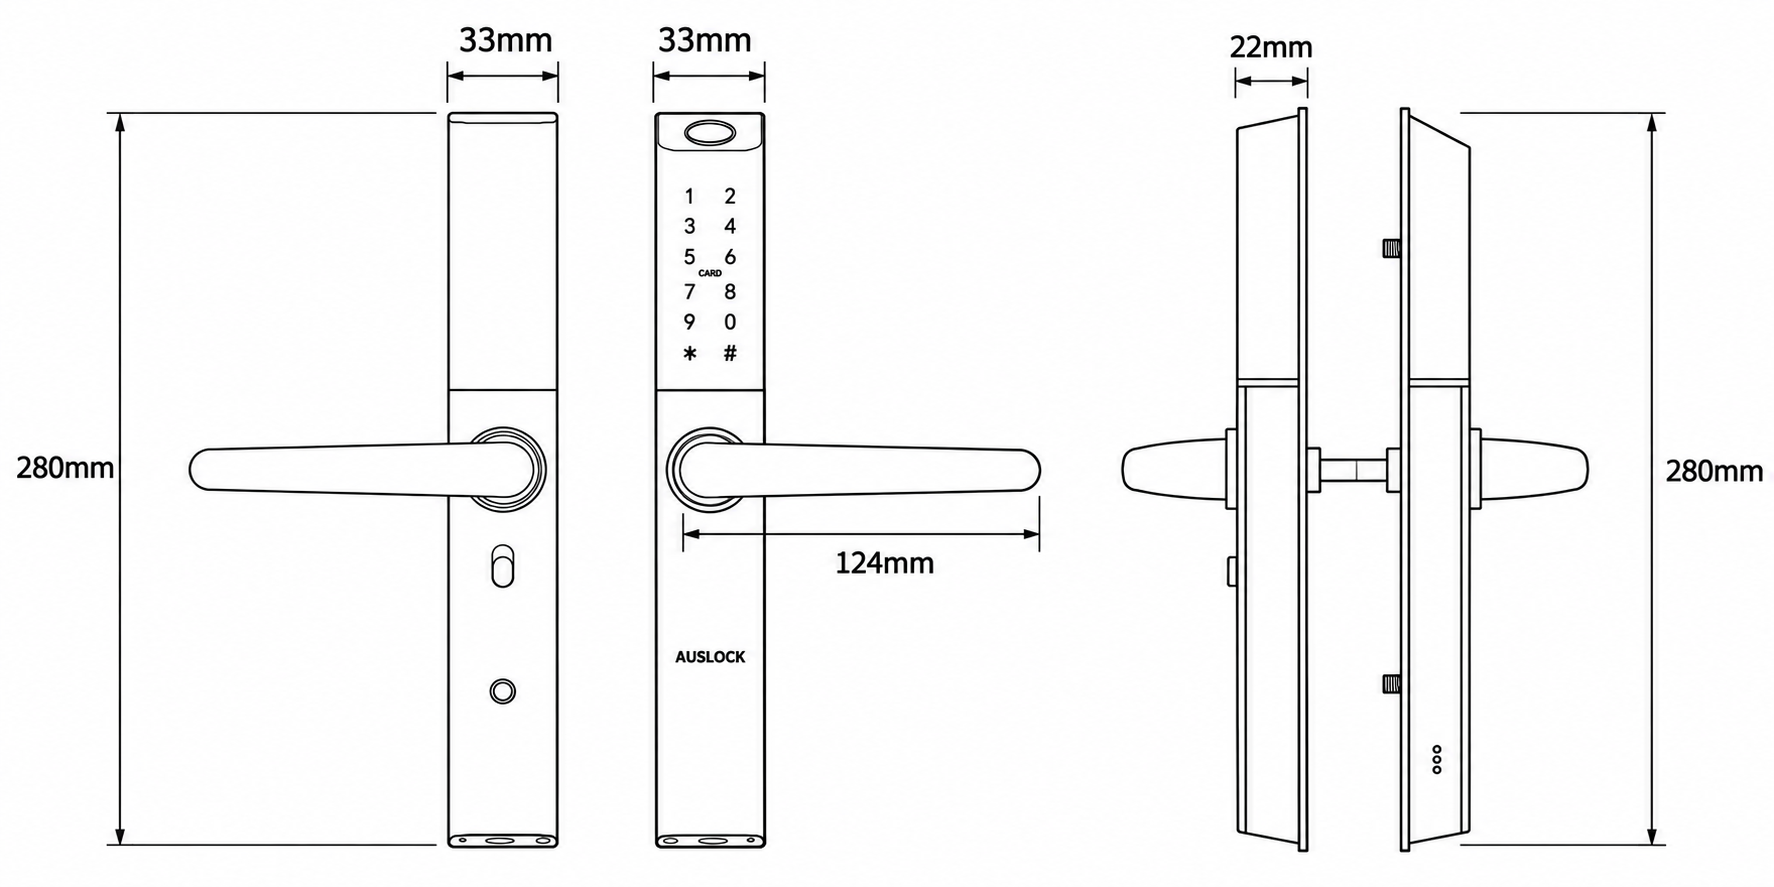
Height: 280 mm
Width: 33 mm
Depth: 22 mm
Handle Length: 124 mm
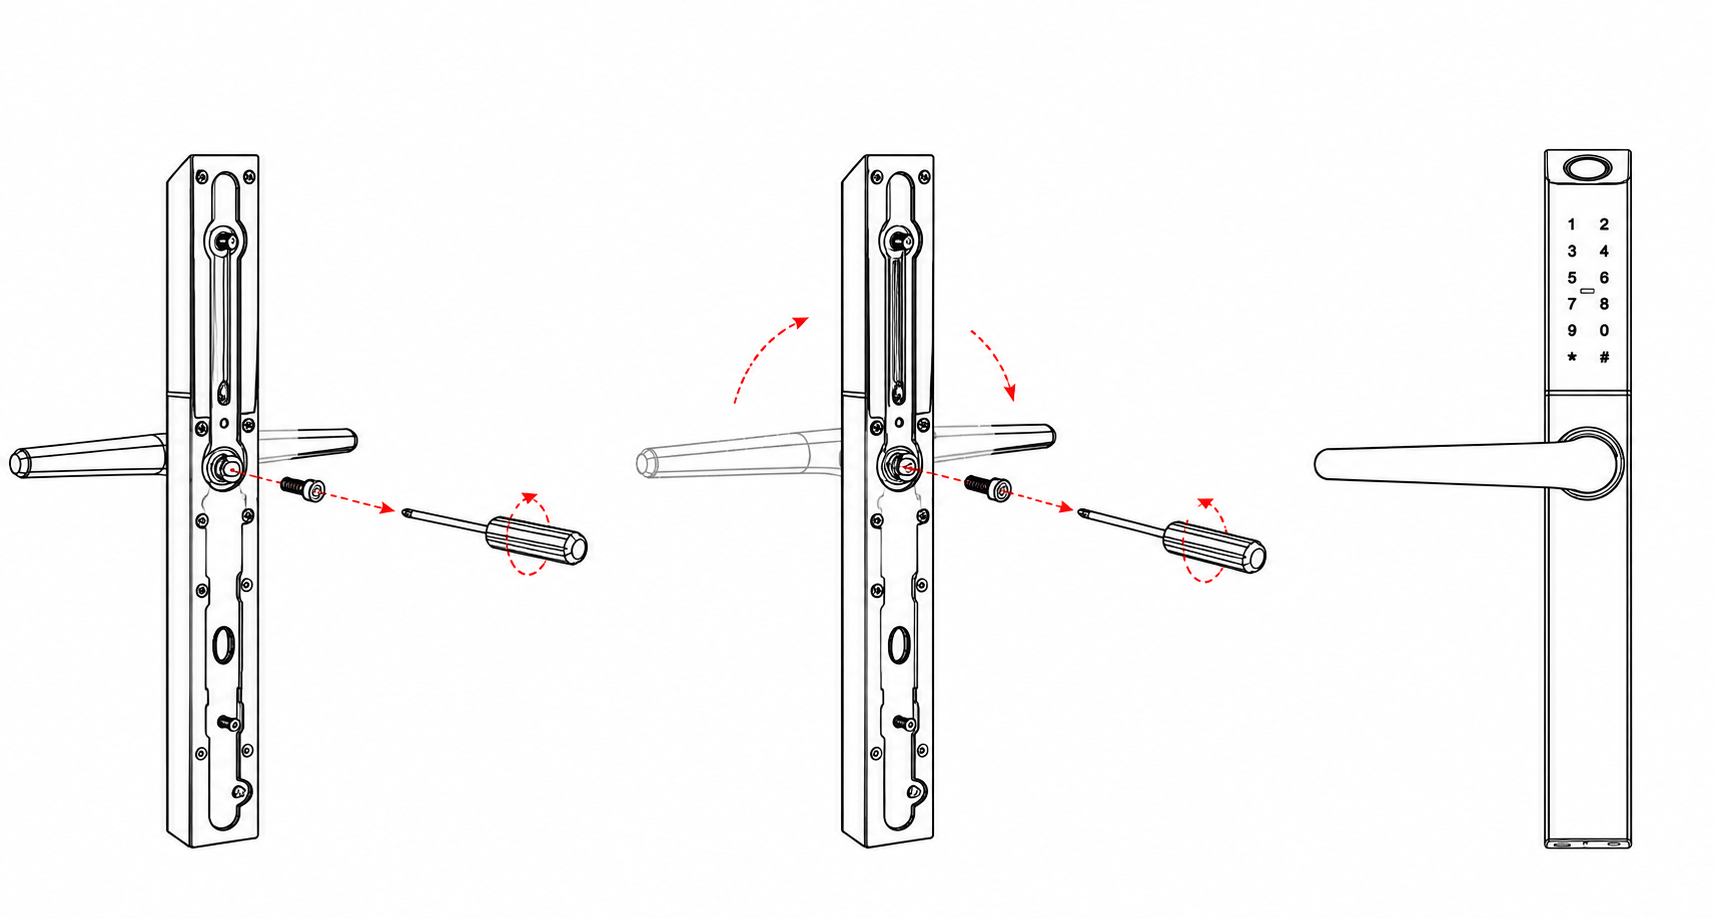
Notice: Adjust the handle according to the direction you open the door. The door opens to the left, with the handle facing left. The door opens to the right, with the handle facing right.
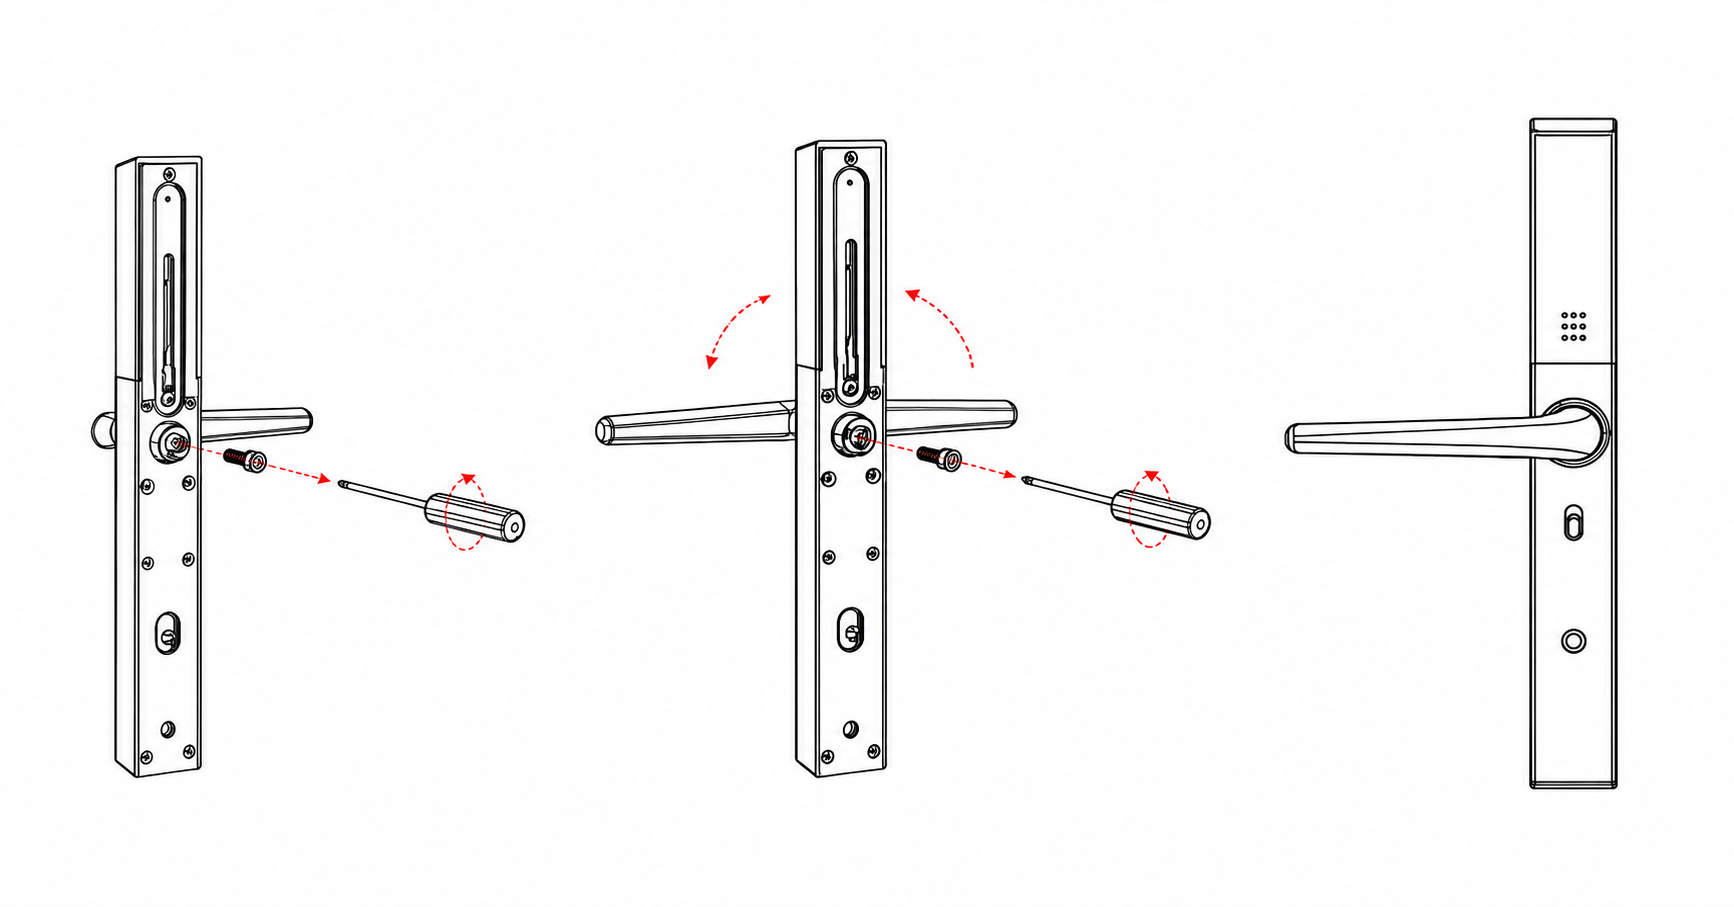
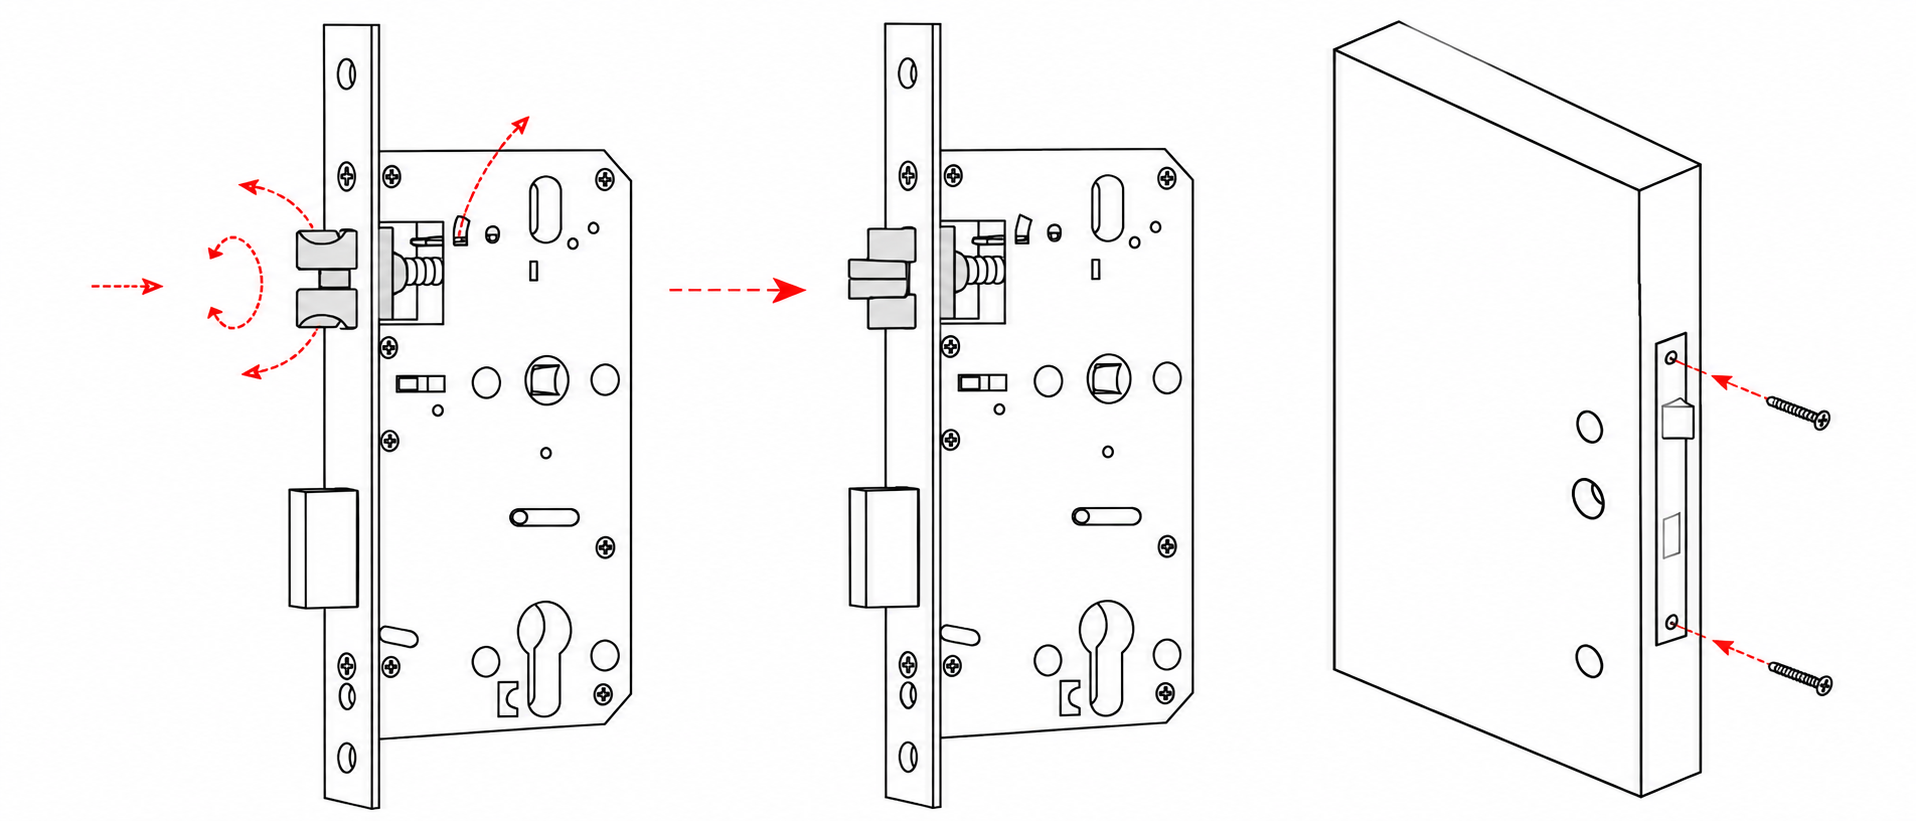
Step 1: Push Upward And Press It Tightly
Step 2: Push The Latch Bolt In The Mortise
Step 3: Turn The Latch Bolt 180°
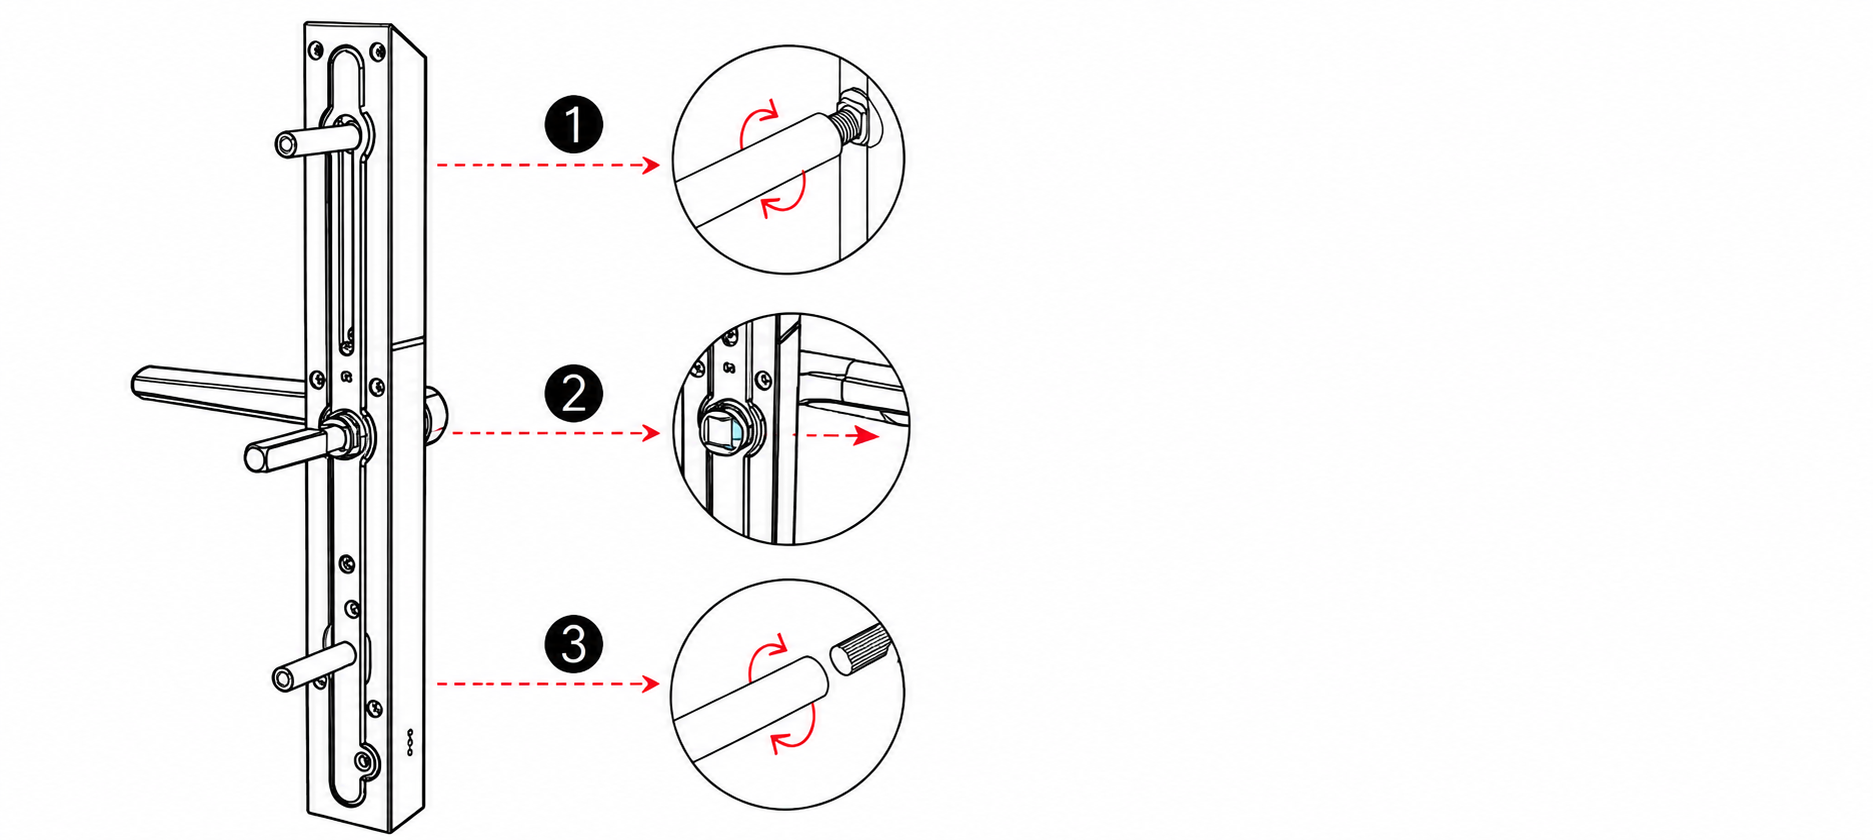
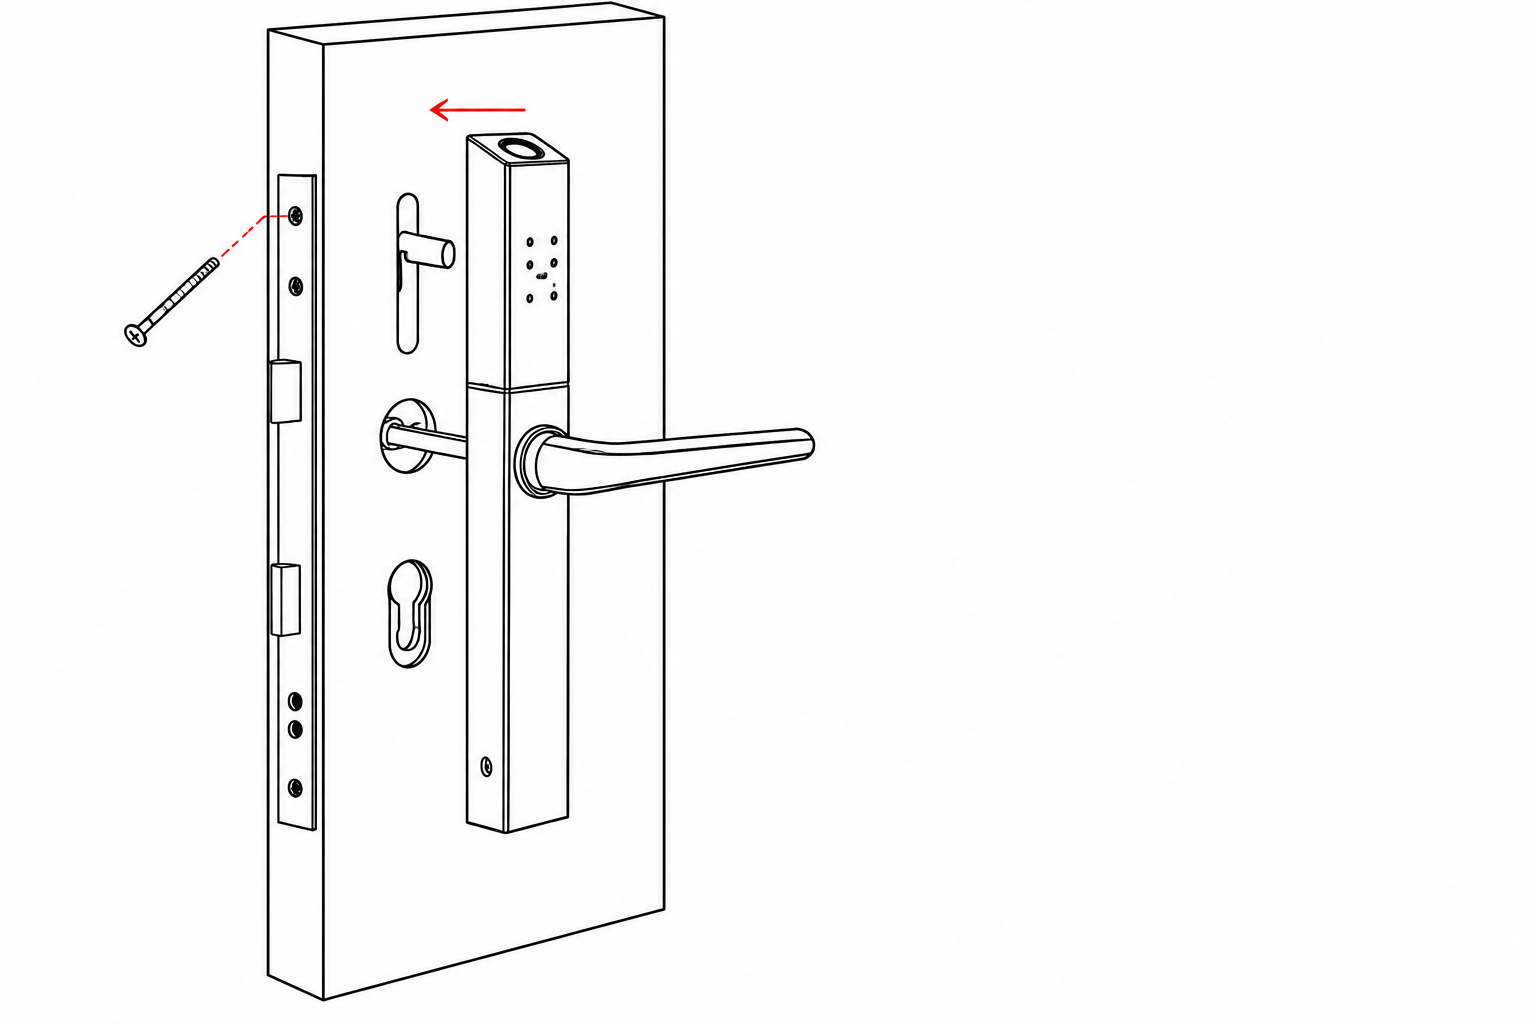
1. Align the front panel with the holes in the door and install it.
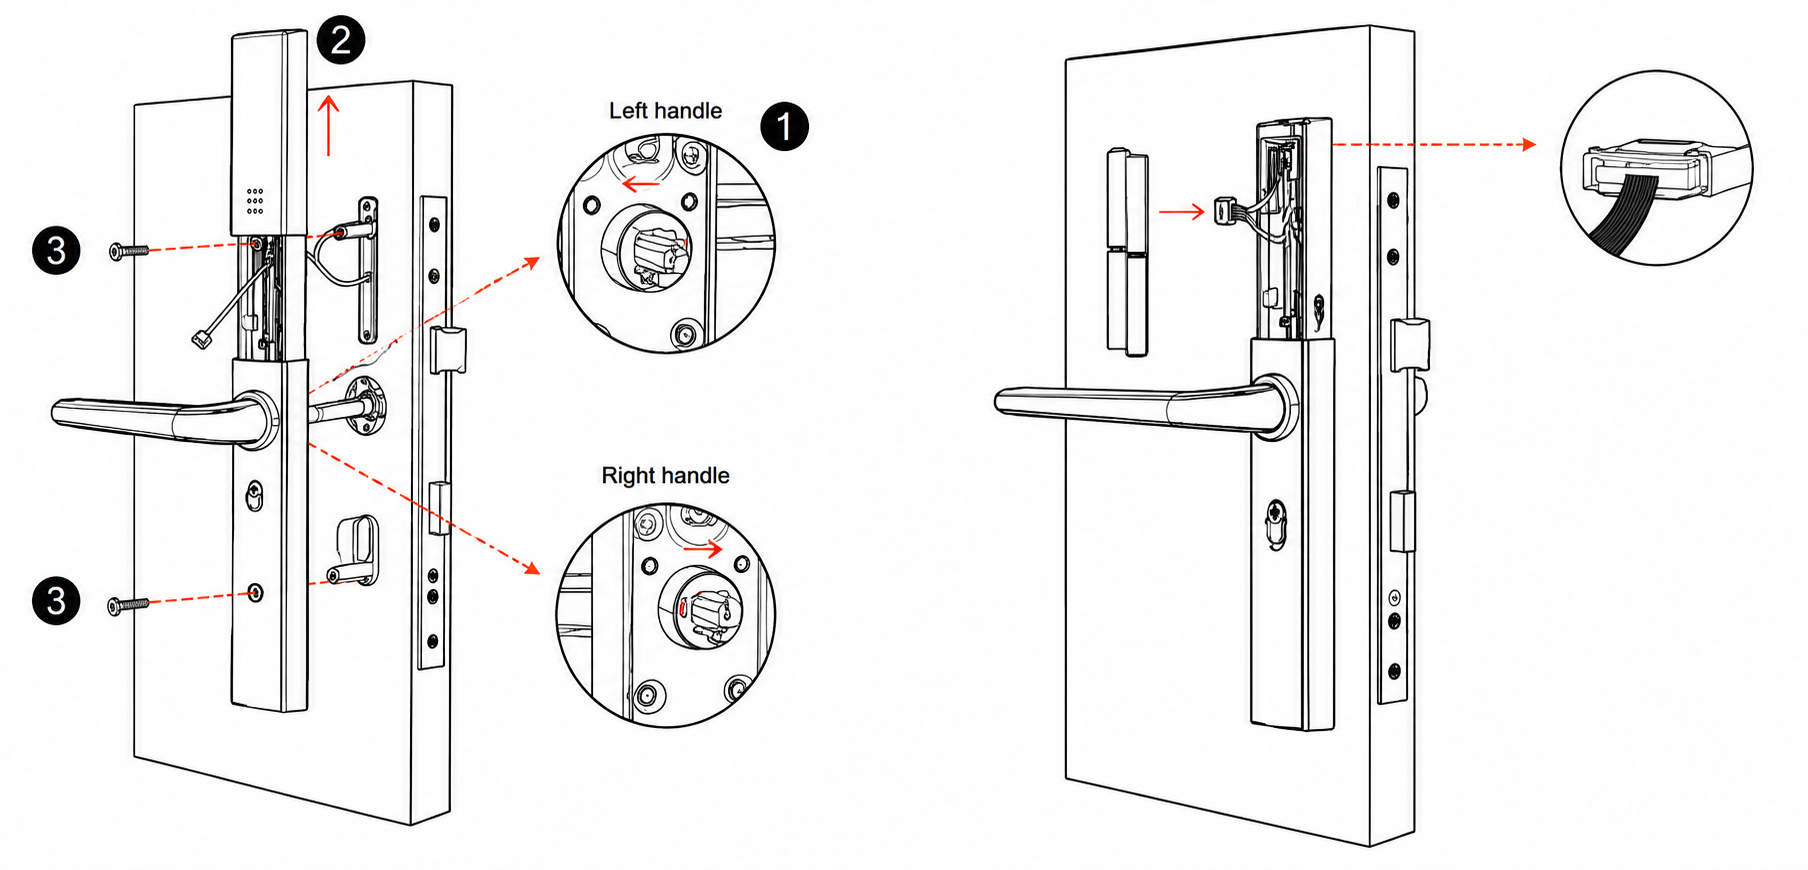
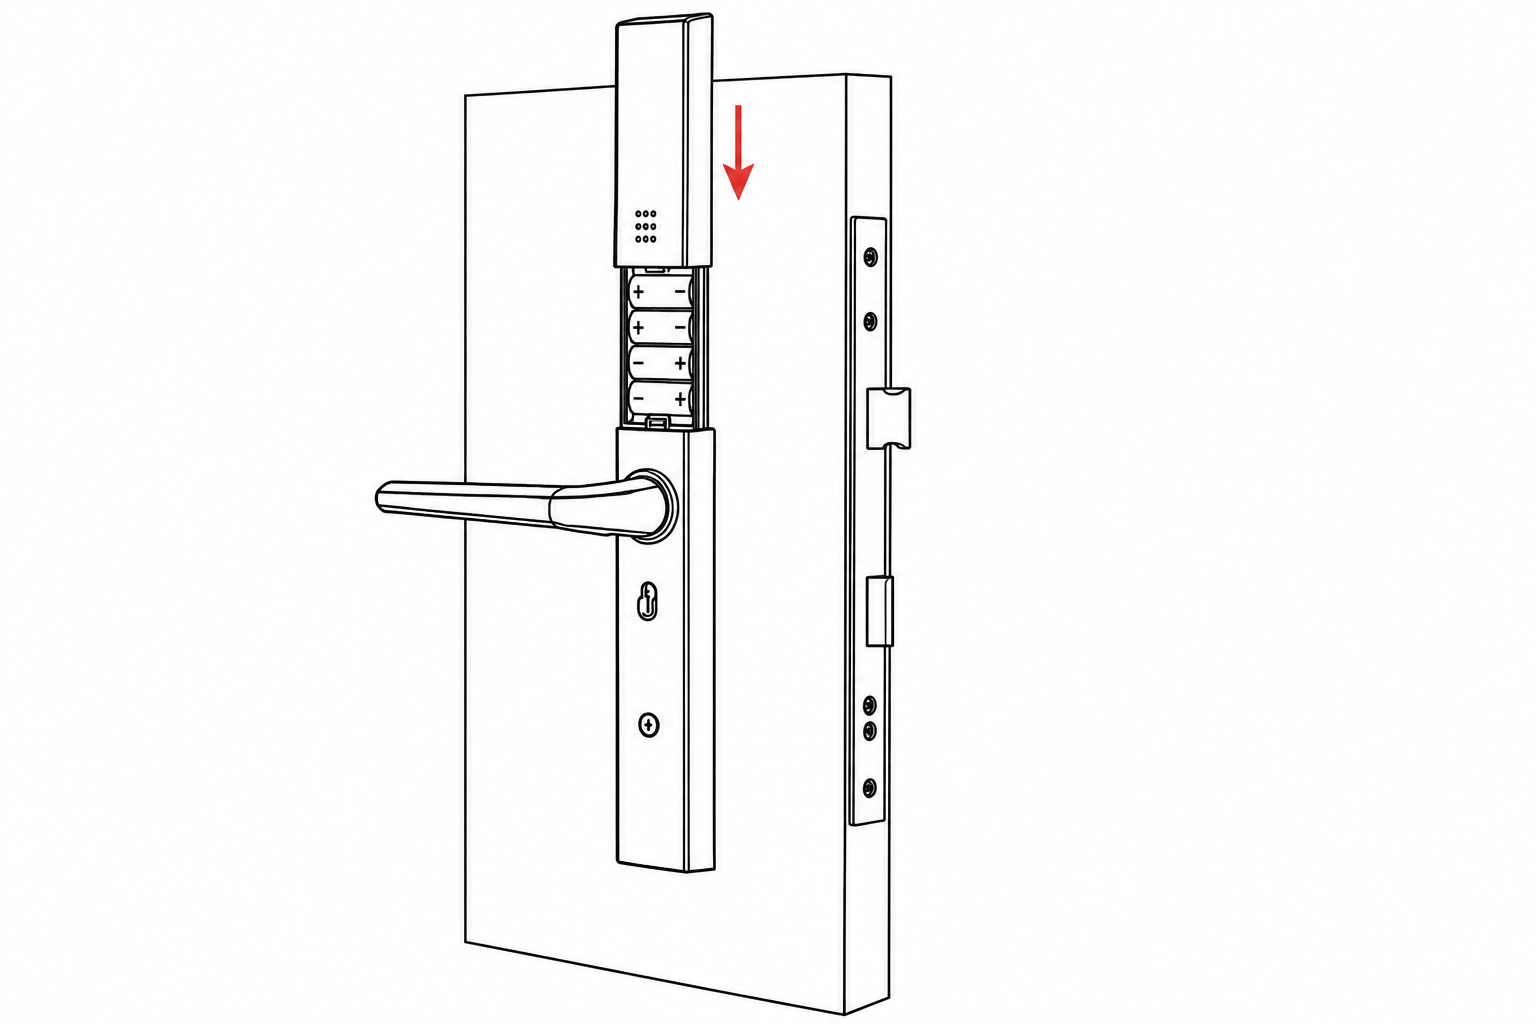
The lock enters pairing mode on its own the first time it is powered. If it does not appear in the search, or it was added to a system before, put it into pairing mode with the inner button as described in step 4.
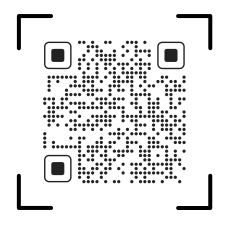
Scan the QR code to download the PIERRE application.
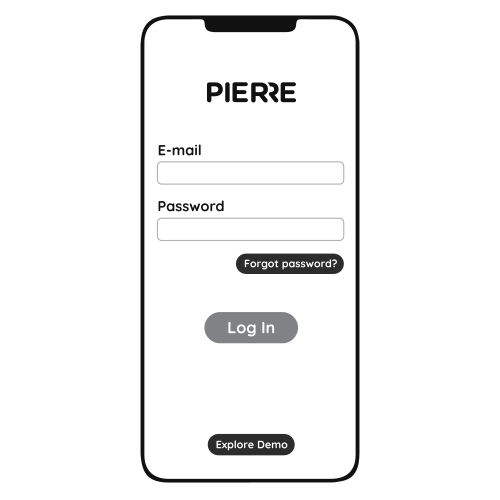
Log in with your username and password.
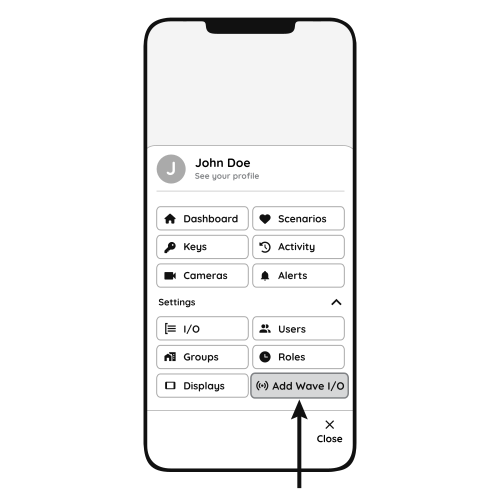
Open Settings and press "Add Wave I/O".
Press and hold the inner button on the lock for 5 seconds and release it at the short beep. A 4-minute pairing window opens: the blue LED pulses slowly and the lock beeps every 10 seconds.
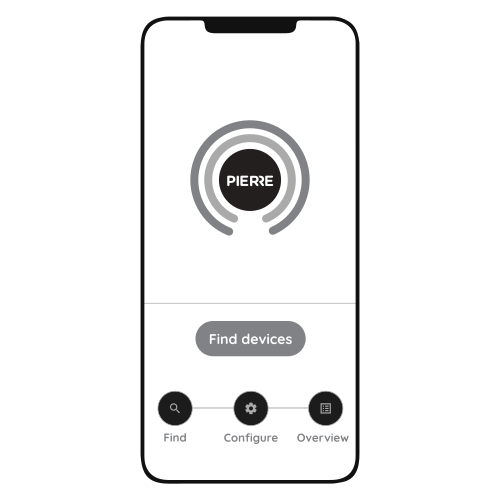
Press "Find Devices".
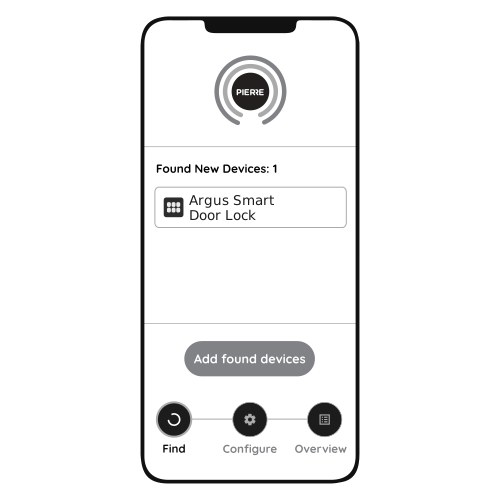
The PIERRE application shows the list of available devices. Press "Add found devices".
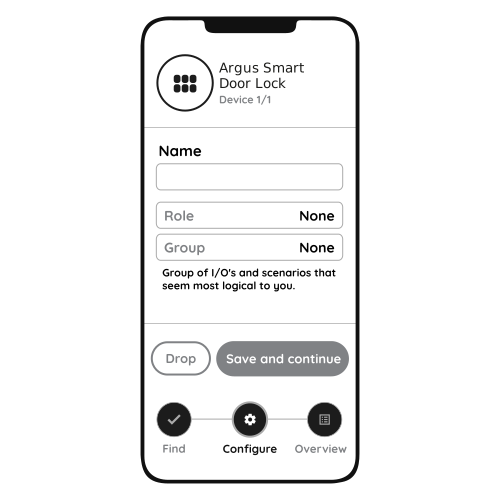
Enter the Name, Role and Group settings, then press "Save and continue".
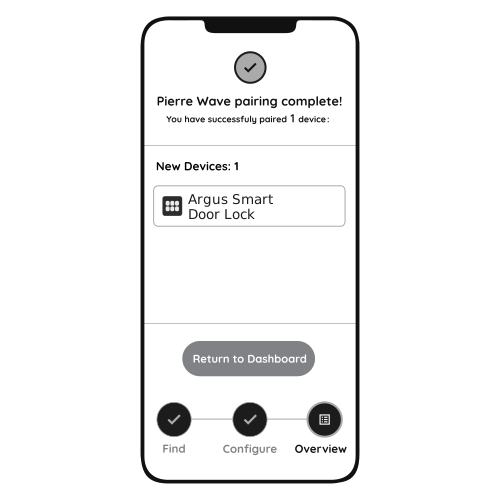
When the application shows "PIERRE Wave pairing complete", the lock is added.
PIN codes and RFID cards for the lock are managed in the PIERRE application as PIERRE tokens. Every user with access to the lock adds their own tokens from their profile.
The lock also appears in the PIERRE application, so it can be opened from the application as well.
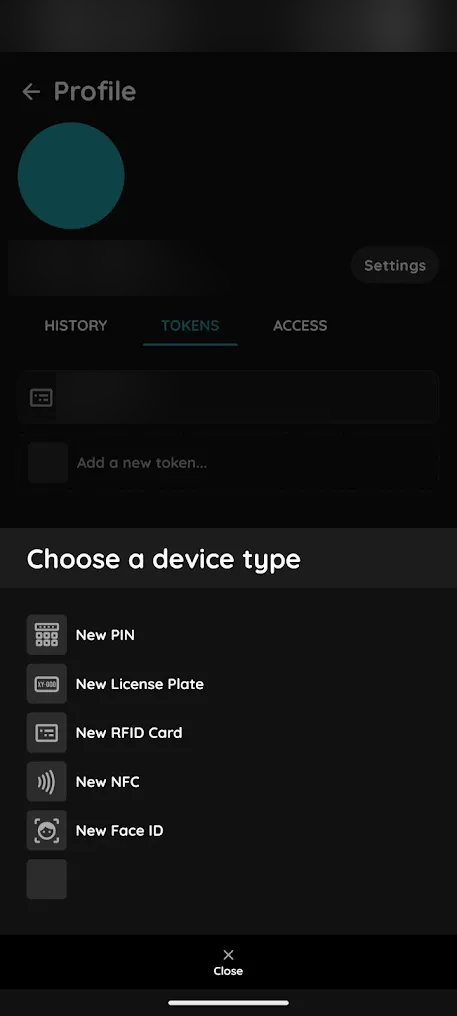
A token does not select the lock itself. It opens the lock when the user's roles give access to it, on the days and at the times set for those roles. Roles and time limits are shown on the ACCESS tab of the profile.
Administrators can also add tokens for other users from that user's profile, on the TOKENS tab.
Press and hold the inner button for 5 seconds and release it at the short beep, then search again within the 4-minute pairing window.
Use the same inner-button procedure. It puts a previously added lock back into pairing mode.
After 5 wrong entries in a row, the keypad locks for 30 seconds. Wait, then try again.
The batteries are nearly empty. Replace them.