Gas Sensor
User Manual

Gas Sensor

SKU: PW-SNS-GAS2

1. Product Size

Image

W: 85 mm

D: 30 mm

2. Product Description

Image
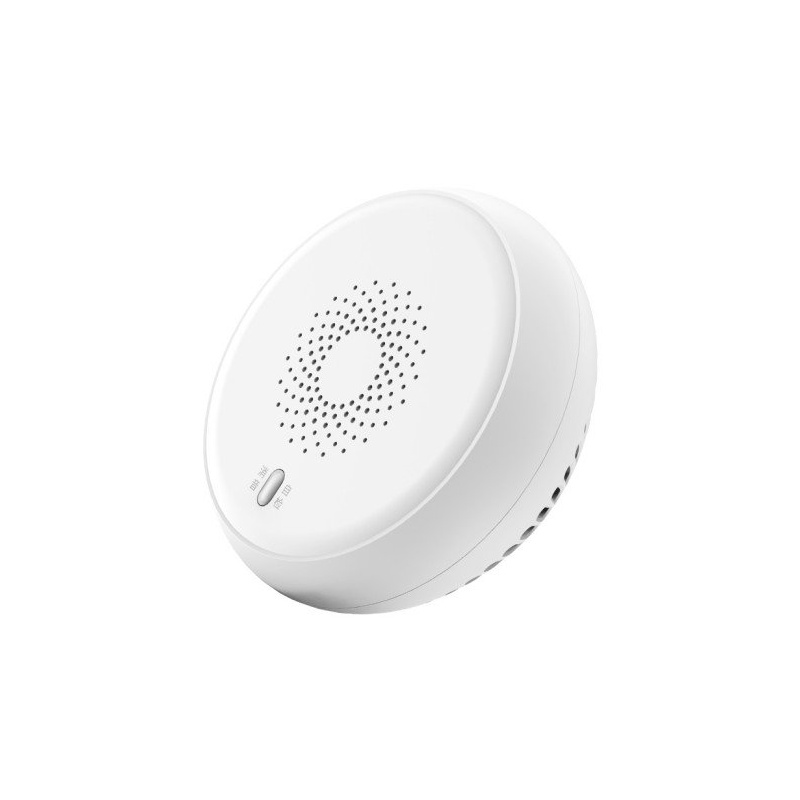
  1. Status indicator / button
    • Short press: test mode
    • Long press: reset / pairing mode
  2. Buzzer and air exchange hole
  3. Power input
  4. USB cable

3. Technical Specification

Technical Specifications

Electrical

Power Supply DC 12V
Current 0.20 A

Connectivity

Connectivity Zigbee
Communication Frequency 2.4GHz

Features

LED Indicators Yes

Sensors

Built-in Sensors CH4 (Methane), CO (Carbon Monoxide), Biogas

Environmental

Operating Temperature +32 ~ +131
Operating Temperature (°C) 0 - +55
Operating Humidity <95 % RH

Physical

Panel Material ABS plastic
Product Color White
Mounting Type Wall mount

4. Indicator Status

LED Status Buzzer Status Meaning
Red LED flashing Buzzer beeps continuously Gas leakage alarm
Yellow LED flashing No sound Detector preheating
Green LED steady on No sound Normal operation
Yellow LED flashing Buzzer beeps intermittently Internal error
Red LED flashing Buzzer beeps 8 times Simulation test mode
Green LED flashing quickly No sound Network configuration mode

5. System Requirements

Image

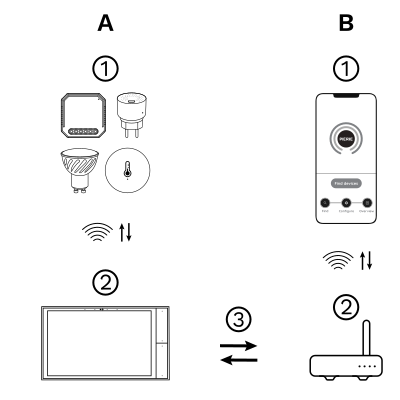
The PIERRE Wave (Zigbee 3.0, 2.4 GHz) system consists of the following components.

Required

  1. PIERRE Wave products: switches, modules, sensors, thermostats and other devices. They connect wirelessly to the gateway.
  2. Gateway: a PIERRE display and/or gateway. It links all PIERRE Wave devices and handles the communication with the app.

Optional

  1. Smart PIERRE app: control and monitoring from a smartphone or tablet. Not required for basic operation.
  2. Router: gives the gateway internet access for remote control.

Operation: the gateway connects to the router by Wi-Fi or LAN. PIERRE Wave products communicate wirelessly with the gateway in both directions: commands are sent and status updates are received through the Smart PIERRE app.

What you need

  • A PIERRE display and/or gateway for the PIERRE Wave (Zigbee 3.0, 2.4 GHz) network.
  • A permanently powered mains socket for the USB cable and power adapter. The sensor is not battery powered.

6. Installation Precautions

  1. Install the device indoors, in areas where combustible gases (e.g., methane) may be present.
  2. Do not install the device outdoors.
  3. Ensure the installation environment temperature is between 0 °C and +55 °C.
  4. Do not place the device in areas exposed to heat, steam, or smoke from gas appliances (e.g., above a gas stove).
  5. Make sure there are no obstacles between the device and the gas source, as this may prevent proper gas detection.
  6. Avoid installing the device in areas with strong airflow, such as near air vents, ventilators, windows, or doors.
  7. Verify that the device is securely connected to a powered socket.
  8. It is recommended to install the device with screws. If using a 3M adhesive sticker, ensure the surface is smooth, dry, and clean.
  9. Regularly check that the device is firmly attached to the surface to prevent it from falling.


7. Installation

Image
  1. Gas Sensor
  2. Optimal ceiling mounting area 1.5 m < H < 3 m
  3. Gas Stove
  4. Floor
  5. 0.2 - 0.6 m distance
  6. Optimal Wall mount installation position


Installation Positions

  • Ceiling Mount: Install the device in a circular zone approximately 1.5 m to 3 m above the gas source.
  • Wall Mount: Install the device on a wall, positioned 0.2 m to 0.6 m below the ceiling and at least 1.5 m away from the gas source.


Image

Use screws to fix the mounting base to the ceiling or wall

Image

Affix the 3M sticker to the rear of the mounting base

Image

Rotate the product clockwise into the mounting base

Image

Affix the product to the target position

8. Using the Product

1. Preheating Mode

When powered on, the device enters preheating mode.

During this stage, the yellow status indicator will flash. Preheating takes no longer than 3 minutes. Once complete, the indicator will turn solid green, showing the device is ready for use.

2. Normal Operation

When the device is functioning correctly, the status indicator will remain solid green, and no alarm sound will be heard.

3. Alarm Mode

If the device is working properly but the gas concentration exceeds the preset alarm threshold, the red indicator will flash and the buzzer will sound an audible alarm.

4. Fault Status

If the detector encounters a fault, the yellow LED will flash and the buzzer will beep every 6–10 seconds.

5. Simulation Test

To run a self-check, short-press the button on the front (see Product Description) while the device is operating. This will activate simulation test mode.

In this mode, the device will send a wireless alarm signal. Once the test is complete, it will automatically transmit a wireless alarm clearance signal.

9. Routine Maintenance and Protection

To ensure reliable performance, the product should be maintained and protected as follows:

  1. Installation and Operation: Install, operate, and maintain the product strictly according to the user manual.
  2. Monthly Self-Diagnostic Test: Perform a self-test once a month. While the product is operating, press the mute/self-diagnostic button to confirm that both the audible alarm and the visual indicator are functioning correctly.
  3. Quarterly Cleaning: Every three months, clean the product cover and air intake vent with a slightly damp, lint-free cloth to remove dust and oil residues. This helps maintain proper airflow and ensures normal alarm function.
  4. Important: Do not use wet towels, alcohol, acetone, or any other chemical solvents when cleaning the device.
  5. Annual Calibration: The product must be calibrated once a year.


Note: Calibration should only be performed by qualified institutions using standard gas and certified calibration tools.


10. Handling Gas Leakage

If the concentration of combustible gas in the air reaches or exceeds the preset alarm threshold, the device will activate an alarm. In the event of a gas leak, follow these safety steps immediately:
  1. Shut Off the Gas Supply: Close the main gas pipeline valve without delay.
  2. Ventilate the Area: Open all doors and windows to allow fresh air circulation.
  3. Eliminate Ignition Sources: Extinguish all open flames, such as cigarette lighters, matches, and gas burners. Do not operate or use any items that could generate sparks or flames, including electronic ignition devices, water heaters, or gas appliances.
  4. Avoid Electrical Appliances: Do not switch any household appliances on or off, as this may create sparks.
  5. Seek Professional Assistance: Identify the cause of the gas leak and contact the appropriate authorities or certified professionals to handle and resolve the issue safely.


11. Other Precautions

  1. This product is designed exclusively for pipeline methane (natural gas) and must not be used with bottled liquefied gas (LPG).
  2. Do not alter or modify the internal structure of the product.
  3. Avoid exposing the detector to high-concentration combustible gases, such as butane lighter gas or pure natural gas. Such exposure may reduce sensitivity or render the detector non-functional.
  4. Keep the product away from large amounts of hairspray, pesticides, paint, adhesives, or thinners, as these substances can cause false alarms and shorten the product’s lifespan.
  5. The built-in sensor typically has a lifespan of five years. After this period, either maintain the sensor or replace the product to ensure reliable performance.
  6. Periodically check that the product is operating correctly. If a fault is detected, contact the vendor and provide details of the issue. Do not attempt to disassemble or repair the product yourself. Only authorized service engineers should carry out repairs, and gas safety must be ensured throughout the repair process.
  7. If attaching the product to a painted surface using a 3M sticker, be aware that paint peeling may cause the product to fall.

12. App-to-Device Pairing

Image

Please scan the QR code to download PIERRE application
Image

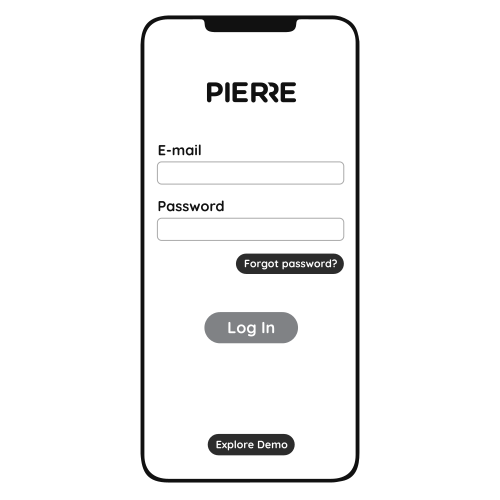
Log in with your Username and Password
Image

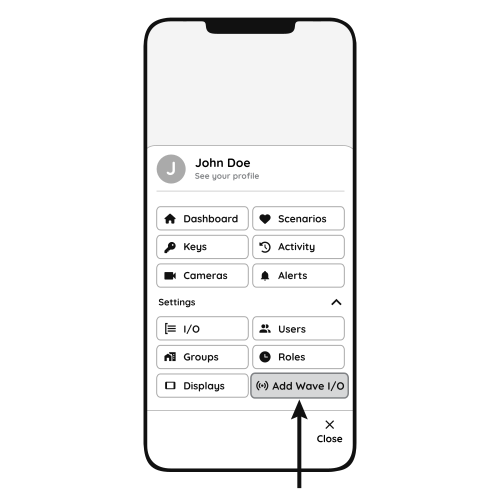
Open Settings and press "Add Wave I/O"

Image

Pairing mode

  1. After power-on the detector preheats for 1–3 minutes; the yellow LED flashes. Wait until it turns solid green.
  2. Press and hold the button for about 5 seconds (the red LED stays on while you hold it), then release. The green LED flashes rapidly: the sensor is trying to join the network.
  • Successful connection: the green LED stays on and the device switches to normal monitoring mode.
  • Failed connection: if pairing is not completed within 60 seconds, the indicator turns solid yellow for 5 seconds and then switches off. Repeat step 2.
  1. Gas Sensor
  2. PIERRE Wave gateway
Image

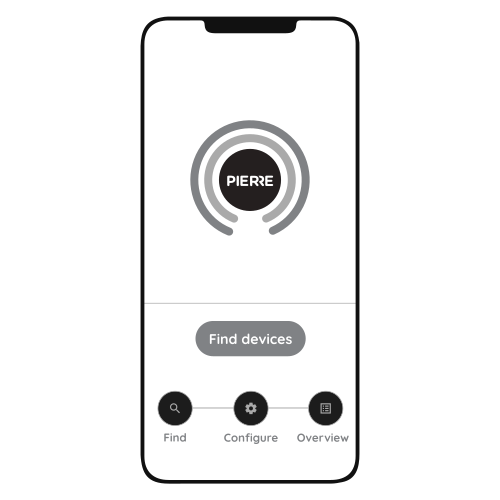
Press "Find Devices"

Image

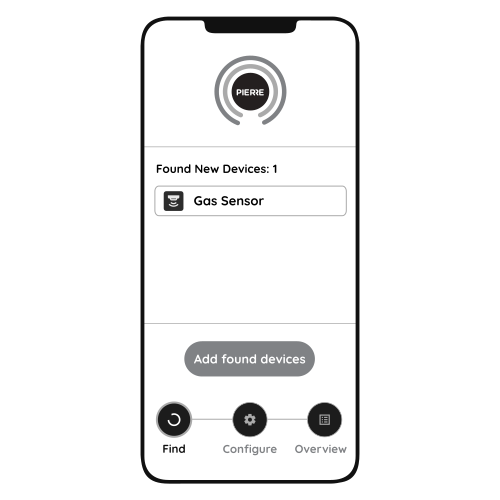
PIERRE application will show the list of available devices. Press "Add found devices"
Image

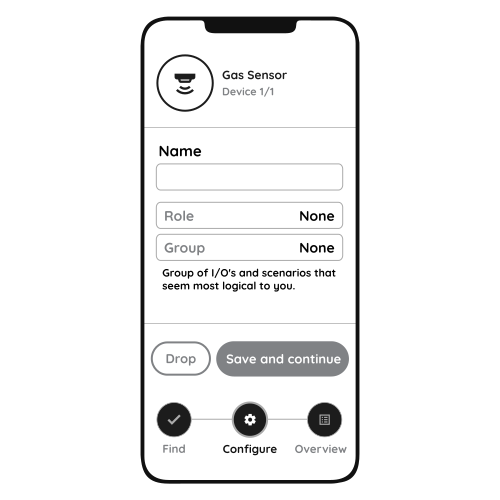
Enter Name, Role and Group settings and Save it
Image

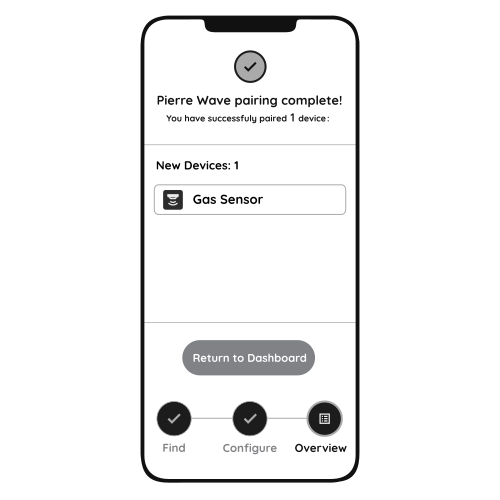
When the Light indicator stops flashing, the PIERRE Wave pairing process is finished

13. FAQ

Q1: Why does the device stay in preheating mode (yellow indicator flashing) after being powered on?

Two possible reasons: the device has been unpowered for a long period, or combustible gas is present during preheating. Keep the device powered for 24 hours, or remove the gas source and restart the device.

Q2: Why does the yellow indicator flash and the buzzer beep?

The detector is defective. Contact your vendor or an authorised service provider.