Smoke Detector
User Manual

Smoke Detector

SKU: PW-SNS-SMOKE
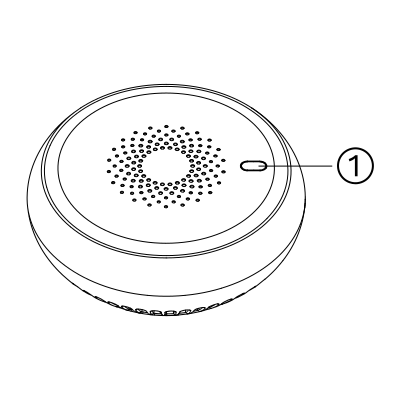
1. Product Description

Image
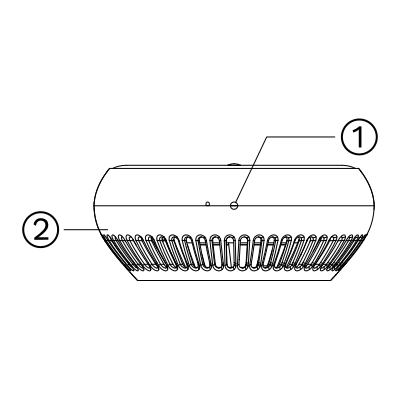
  1. Status Indicator
Image
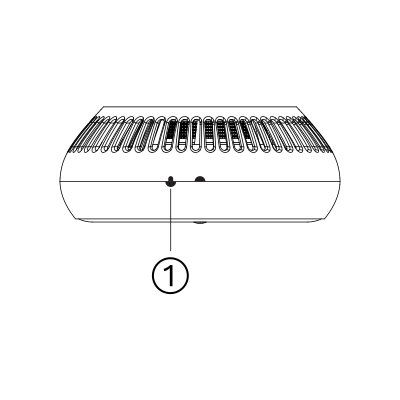
  1. Alignment mark
  2. Mounting base

2. Product Size

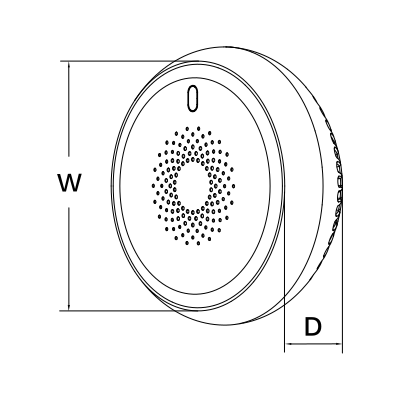
Image

W: 90 mm

D: 37 mm

3. Technical Specification

Technical Specifications

Connectivity

Connectivity Zigbee
Communication Frequency 2.4GHz

Environmental

Operating Temperature +14°F - +131°F
Operating Temperature (°C) -10 - +55
Operating Humidity 10 - 90 % RH

Electrical

Power Supply CR123A Battery

Sensors

Built-in Sensors Smoke

Physical

Panel Material ABS+PC material
Product Color White

Features

Operation Range 100 m

4. Steps before Instalment

Before installing and configuring the sensor, please follow the steps below to ensure the device is correctly powered on and ready for use.
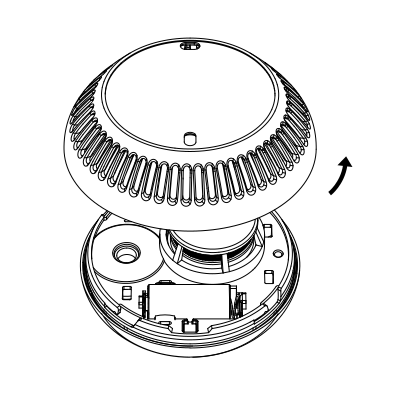
Image

Rotate the mounting base anticlockwise to open
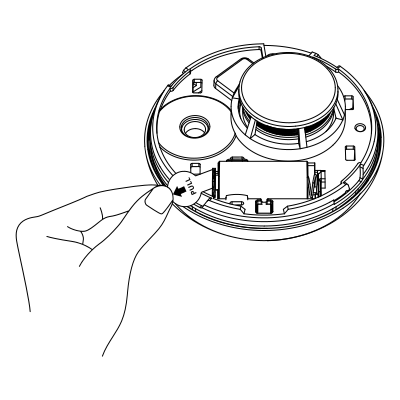
Image

Remove battery insulation film

5. Installation Precautions

To ensure safe and reliable operation, please observe the following guidelines when installing the product:
  1. Mount the device only on indoor ceilings.
  2. Install the product at least 50 cm away from lighting fixtures.
  3. Do not install the product in bathrooms or other damp environments.
  4. Avoid placing the device in areas with non-fire smoke or steam.
  5. Ensure the installation environment temperature is within the range of –10°C to +55°C.
  6. If a cupboard is close to the ceiling, position the product at least 60 cm away from the cupboard.
  7. Keep a minimum distance of 150 cm from ventilators, air conditioners, and air vents.
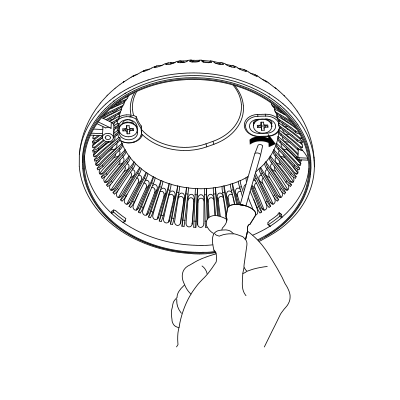
  8. It is recommended to install the device using screws. If you use a 3M adhesive sticker, any product damage or safety issues that occur will be your responsibility.
  9. When using a 3M sticker, attach the product only to a smooth, dry, clean, and even surface.
  10. Regularly check that the product is securely attached to the surface to prevent it from falling.
  11. Do not mount the product onto the base unless the battery is properly installed.
  12. If affixed to a painted surface, note that peeling paint may cause the product to fall. In such cases, the user is responsible for any resulting damage or issues.


6. Installation Method 1

Image

Use screws to fix the mounting base to the ceiling
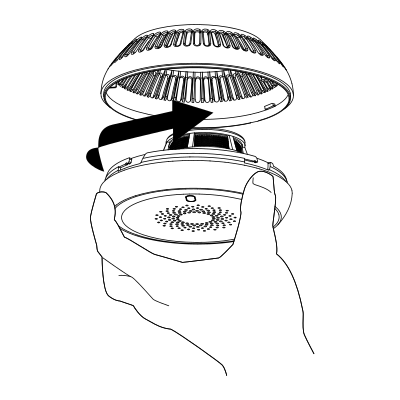
Image

Rotate the product clockwise into the mounting base
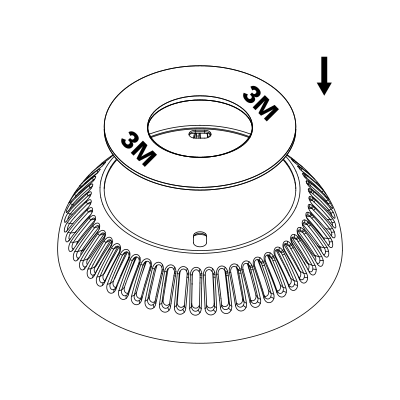
7. Installation method 2

Image

Remove protective film from the 3M sticker and attach the sticker to the mounting base
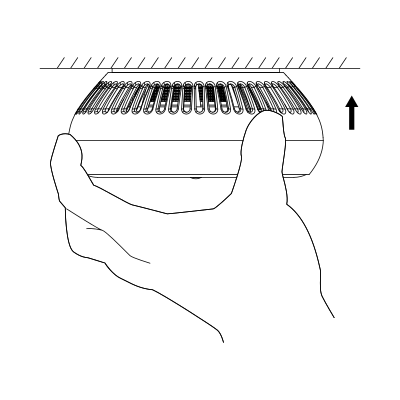
Image

Remove the protective film from 3M sticker and attach the product to the ceiling
8. Installation checking

Image

Improperly installed

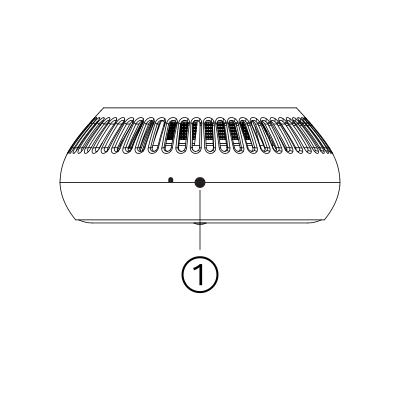
If the semicircle on the product is aligned with the line on the mounting base to form an arrow, the product is installed improperly
Image

Properly installed

If the semicircle on the product and mounting base are aligned to form a circle, the product is installed properly

9. Fire Alarm Function

When smoke is detected, the device will immediately activate both audible and visual alarm signals.

In the event of a real fire, take appropriate action without delay. For example, call the local fire emergency number or use a fire extinguisher to put out the flames.

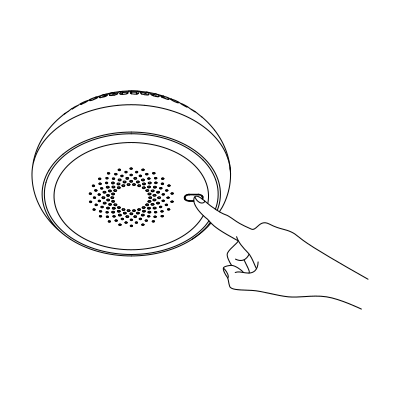
If no fire is present, press the mute/self-diagnostic button to silence the alarm.

  • The alarm will remain muted for 90 seconds. During this time, no audible or visual signals will be generated. After 90 seconds, the device will automatically return to its normal detection state.

Please note that the product may also generate a false fire alarm if directly exposed to the following:
  • Mist from pesticides or cosmetics
  • Smoke from cigarettes or incense sticks
  • Smoke-type or thermal evaporation-type pesticides
  • Cooking smoke or steam
  • Condensation


10. Alarm and Test

Image
  1. Detection Mode: When in detection mode, the status indicator blinks red every 50 seconds.
  2. Self-Check Mode
  3. To perform a test, press the mute/self-check button. The status indicator will turn red.
  4. If the button is held for less than 5 seconds, the device will enter self-check mode. In this mode, the status indicator flashes red, and the buzzer will sound (similar to an actual alarm).
  5. Alarm Activation: When the smoke density reaches the preset alarm threshold, the device will automatically generate an audible and visual alarm.
  6. Safety Note: During self-check testing, keep a safe distance from the buzzer to avoid potential hearing damage from loud alarm sounds.
  7. If the product generates an alarm during monitoring, this may indicate a potential risk. Do not ignore the alarm—always try to identify and address the cause.
Important: Ignoring an alarm could result in property damage, personal injury, or even death. -If the product fails a test, refer to the Troubleshooting section to resolve the issue. -If the fault persists after testing, replace the product immediately.
Mute Function ⚠️ If the product generates an alarm, potential risks may exist. Before muting the device, make sure that no fire is present. Do not block or disable the product in any way. Doing so will prevent the device from offering protection. If smoke is detected from non-fire sources (e.g., cooking such as bacon frying), press the mute/self-diagnostic button to silence the alarm. When muted: The status indicator will blink red rapidly. The product will remain muted for 90 seconds, after which sensitivity will automatically be restored. If smoke density around the device remains high, the alarm will sound again. In this case, open doors and windows to ventilate the area and clear the smoke. ⚠️ If the cause of the alarm is unknown, always try to locate the source. Never ignore the alarm, as doing so could result in property damage, injury, or death.

11. Routine Maintenance

Image

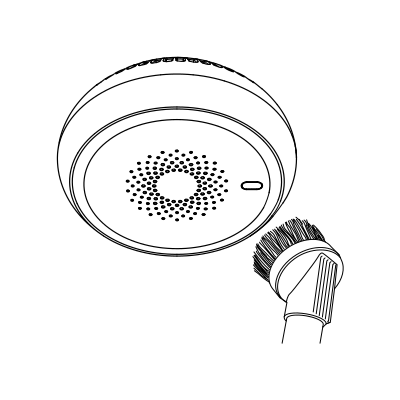
This product is designed to be low-maintenance. To ensure reliable operation, perform the following routine checks:
  1. Weekly Test: Test the product at least once a week. For detailed instructions, refer to the “Alarm and Test” section.
  2. Annual Cleaning: Clean the product at least once a year using a vacuum cleaner and a soft brush to remove dust and debris.


⚠️ Important Cleaning Guidelines Use only a cotton cloth or sponge to wipe the surface. Do not use solvents, detergents, or liquid cleaners, as these may enter the device and damage the sensor or internal circuitry. Do not paint the product. Paint may block the smoke intake vents, causing the device to malfunction.

12. System requirements

Image

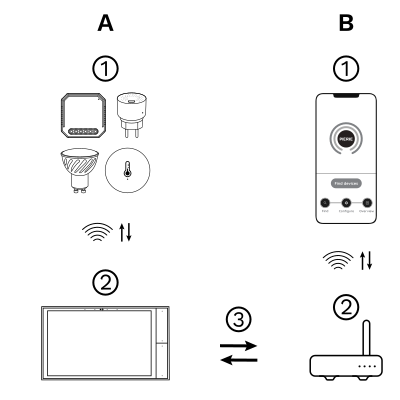
The PIERRE Wave system is a user-friendly solution for integrating and managing smart devices through a central platform. The system consists of the following components:

A - Required Elements:

  1. PIERRE Wave Products: These smart devices, including lighting, thermostats, sensors, and other appliances, connect wirelessly to the PIERRE Wave Gateway. They provide essential functions and capabilities for the system.
  2. PIERRE Wave Gateway: The central unit linking all PIERRE Wave devices, the gateway manages communication and data exchange, ensuring security and stability. It supports remote access and control, with the default Berlin display interface, though users can choose any PIERRE display model.

B - Optional Elements:

  1. Mobile PIERRE App: This app allows users to manage and monitor the system from their smartphone or tablet, offering real-time updates and remote access. It provides convenience but is not necessary for basic system operation.
  2. Router: An optional component that enables internet connectivity, allowing devices to be accessed and controlled remotely.

  1. System Operation: The gateway can connect to the router via Wi-Fi or LAN for internet connectivity, enhancing remote management capabilities. PIERRE Wave products communicate wirelessly with the gateway, which acts as the central hub. This bidirectional communication allows data to flow both ways, enabling users to send commands and receive status updates through the Mobile PIERRE App. The app facilitates effective management and real-time feedback on device statuses.

13. App-to-Device Pairing

Image

Please scan the QR code to download PIERRE application
 

Image

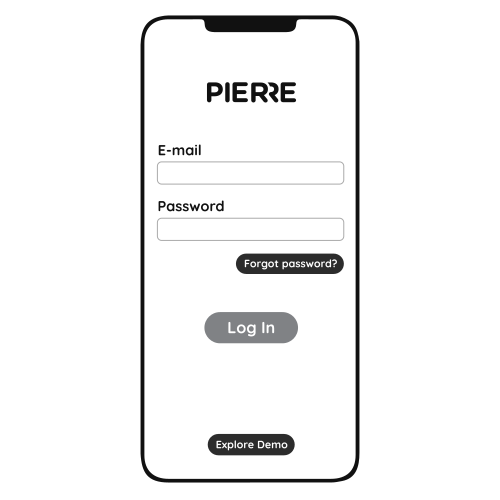
Log in with you Username and Password
 

Image

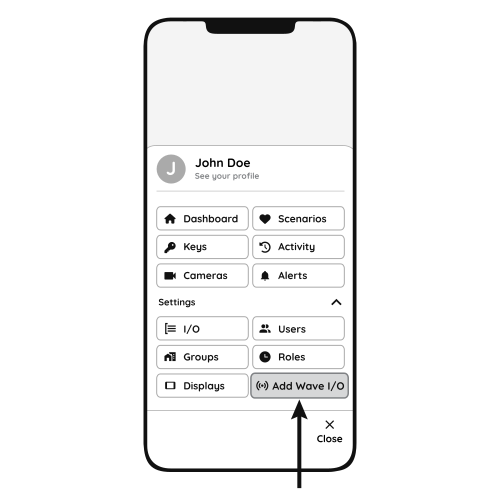
Open Settings and press "Add Wave I/O"
 

Image

Press the reset button for 5 seconds and release it. The green LED will begin flashing, indicating that the device is ready for network configuration.
  1. Smoke Detector
  2. PIERRE Wave Gateway


Network Configuration Notes

  • Press and hold the reset button for 5–10 seconds to start network setup.
  • While holding, the red LED will turn on.
  • After 5 seconds, the red LED will switch off and the green LED will turn on.
  • Release the button, and the green LED will flash to show that the device is entering network configuration mode.
  • If the network setup is successful:
  • The green LED will stay on for 5 seconds, then turn off.
  • The device will enter normal network monitoring mode.
  • If the network setup fails within 60 seconds:
  • The yellow LED will stay on for 5 seconds, then turn off.
  • The device will switch to standalone working mode.


Image

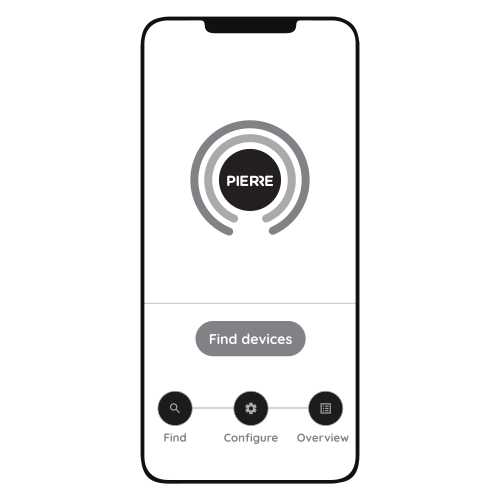
Press "Find Devices"
 

Image

PIERRE application will show the list of available devices. Press "Add found devices"

Image

Enter Name, Role and Group settings and Save it

Image

When the Light indicator stops flashing, the PIERRE Wave pairing process is finished

14. FAQ

Q1: The product does not respond. What should I do?

A: Check whether the device is correctly mounted onto the mounting base.


Q2: The product beeps intermittently (about every 40 seconds). What does this mean?

A: This indicates that the battery level is low. Replace the battery within one week.


Q3: Why does the product often trigger alarms when there is no fire?

A: Try relocating the smoke alarm, as its current position may be causing false alarms.


Q4: The product frequently sounds alarms even when there is no fire or smoke. How can I fix this?

A: Clean the device thoroughly or reinstall it in another position to reduce false alarms.

⚠️ Important: If the issue persists after performing these steps, contact your local vendor. Do not disassemble the product yourself, as this will void the warranty.