User Manual
The One - Wave Gateway
SKU: PW-SZG
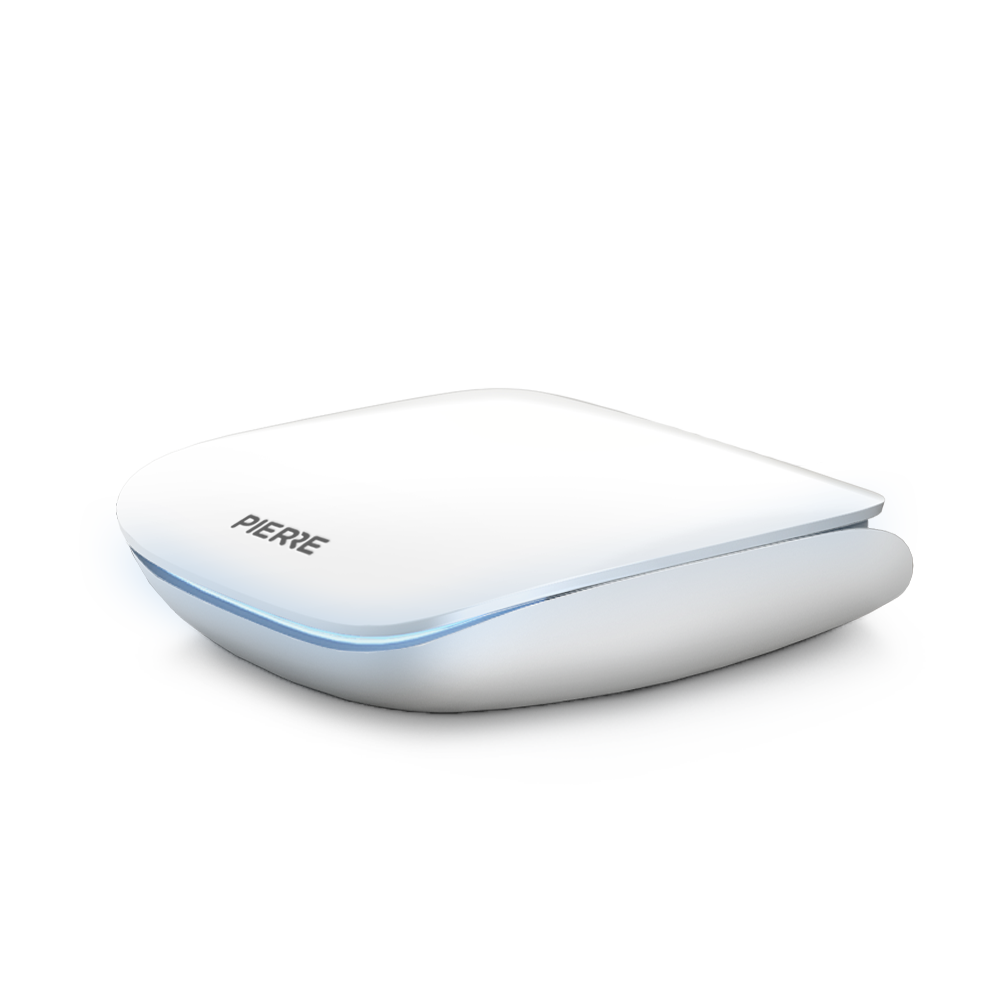
The PIERRE Wave Gateway is the device that connects the wireless PIERRE Wave network to the rest of the PIERRE system. PIERRE Wave uses a Zigbee mesh, and the gateway is the coordinator of that mesh: it forms the network, admits devices to it and passes their traffic on to the PIERRE system and to the Smart PIERRE application.
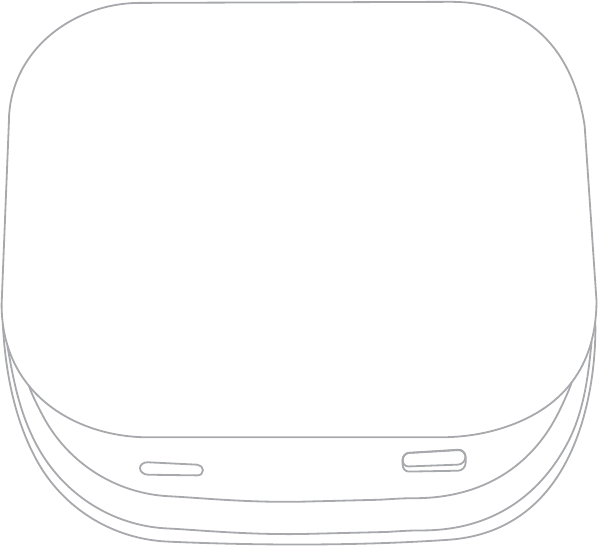
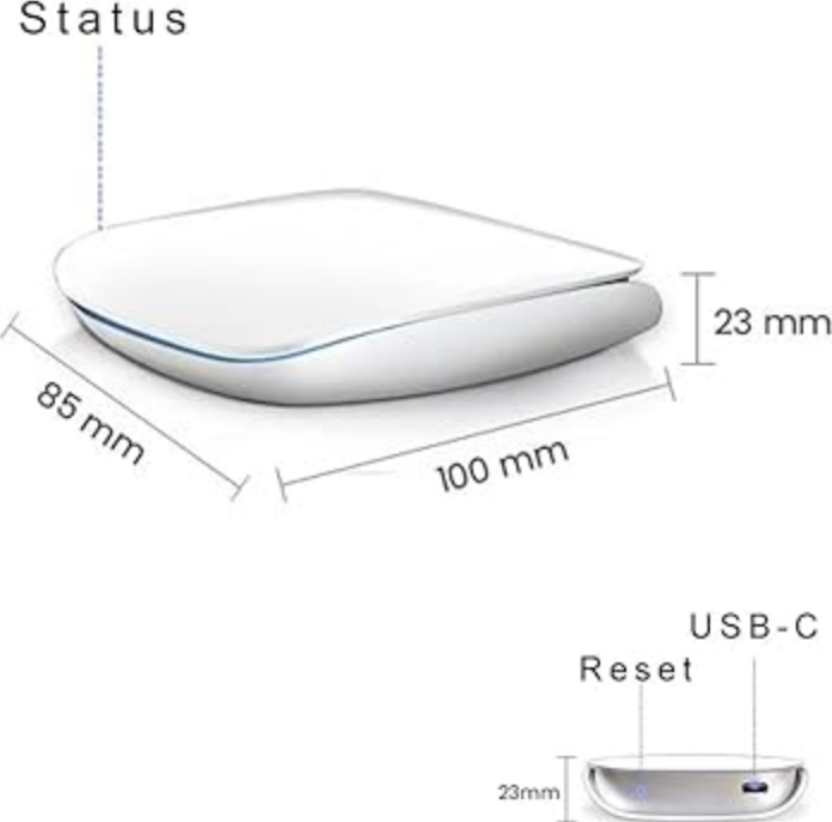
The gateway is a freestanding unit. It is powered from a USB-C supply and reaches the network either over its Ethernet port or over Wi-Fi. A single RGB status LED on the top face reports what the device is doing, and a recessed push button on the rear edge starts the gateway in commissioning mode when it is held during power-up.
A PIERRE display can also provide the gateway function. Where a display is already planned, a separate gateway may not be needed. Where no display is planned, or where the wireless coverage needs a coordinator in a different position, this gateway provides the function on its own.
| Property | Value |
|---|---|
| Enclosure dimensions | 100 x 85 x 23 mm |
| Mounting type | Freestanding |
| PCB dimensions | 69.75 x 78.87 mm (W x H), overall extent |
| PCB thickness | 1.6 mm |
| PCB construction | 4 layer FR-4 |
| PCB mounting holes | 4 x 3.7 mm diameter, 33.03 x 54.00 mm pitch |
Every PIERRE Wave network has one coordinator, and the gateway is it. Around that coordinator the network is built from two other kinds of device.
| Role | Provided by | Function |
|---|---|---|
| Coordinator | PIERRE Wave Gateway, or a PIERRE display acting as gateway | Forms the Zigbee network, admits devices and assigns addresses. One per network. |
| Router | Permanently powered Wave devices: smart plugs, wall switches and relay or blind modules with L and N | Repeats traffic for other devices and extends the mesh. Must stay permanently powered. |
| End device | Battery powered sensors, scenario switches, radiator valves, modules without neutral | Communicates through the mesh but does not repeat traffic for others. |
Install and pair in this sequence: gateway, then router devices, then end devices. The router infrastructure should already exist when end devices are paired. An end device paired before the routers around it are in place may attach through a distant or unsuitable path, and can become slow or unavailable later.
PIERRE Wave uses the 2.4 GHz band, the same band as Wi-Fi. Where performance is inconsistent, separate the two: with Zigbee on channel 20, 25 or 26, use Wi-Fi channel 1 or 6.
| Property | Value |
|---|---|
| Model | PZG-1 |
| Hardware revision | 4.0 |
| Radio | Zigbee, Wi-Fi, Bluetooth LE |
| Frequency band | 2400 to 2483.5 MHz |
| Power input voltage | 5 V DC, via USB-C |
| Recommended supply | 5 V DC / 1 A minimum |
| Power consumption | 5 W |
| Connector type | USB-C (power only) |
| Ethernet port | Standard RJ45 connector for wired LAN |
| Push button | Held while powering on, starts the gateway in commissioning mode. Pressed during normal operation, restarts the gateway. |
| Status indicator | Multi-colour RGB LED |
| Operating temperature range | 0 °C to +50 °C |
| Ingress protection | IP20, indoor only |
| Enclosure dimensions | 100 x 85 x 23 mm |
| Mounting type | Freestanding |
The gateway has no internal power supply and is not supplied with one in every package. Use a USB-C supply that meets the following specification.
| Property | Requirement |
|---|---|
| Output voltage | 5 V |
| Minimum output current | 1 A |
| Connector type | USB Type-C, standard plug |
| Power rating | At least 5 W, for example 5 V / 1 A |
| Certification | CE marked, with over-voltage and short-circuit protection |
| Cable length | 1 to 2 metres, shielded USB-C cable |
Recommended type. A standard 5 V / 1 A USB-C wall charger of the kind used for mobile devices.
Where the gateway is placed decides how well the whole wireless installation works. It is the coordinator of the Zigbee mesh, so every device either talks to it directly or reaches it through a router.
The gateway can handle a limited number of direct connections. Build the network outward, gateway to router to router to end device, rather than letting every device attach straight to the gateway.
The gateway is commissioned over Bluetooth from the Smart PIERRE application. A new gateway enters commissioning mode on its own the first time it is powered, because it has no stored settings yet. Nothing needs to be pressed.
Plug the gateway into a 5 V USB-C supply. It has no power switch and starts as soon as it is powered.
White means the gateway is in Bluetooth commissioning mode and is waiting for the phone. While it is in this mode it is visible over Bluetooth as Pierre Bridge.
A gateway that has already been set up will not enter this mode by itself; it will try to reconnect with its stored settings instead. To commission it again, hold the button on the rear edge while you connect the power.
In Smart PIERRE go to Menu → Settings → Bridges and search for available devices. Gateways are listed as bridges. Select PIERRE Wave Gateway as the type and pick the gateway that is found.
The application then asks for the connection method.
Then choose DHCP, or enter a fixed address, subnet mask, default gateway and DNS server if the installation requires one. Give the gateway a name that identifies it later, which matters as soon as a building has more than one.
The gateway stores the settings and restarts. After the restart it joins the network and connects to the PIERRE system, and the status LED turns green. If it stops at another colour, see LED indicator description.
Once the gateway is online it switches its Bluetooth radio off, so a working gateway will not appear in a Bluetooth search. That is normal. Use the button at power-on to bring it back into commissioning mode.
With the gateway online, the wireless devices are paired to it. In Smart PIERRE:
Paired devices then appear in the I/O list under the Wave section, and can be used in dashboards, automations, scenes and roles.
Pair in the right order. Gateway first, then the permanently powered router devices, then the battery powered end devices. An end device paired before the routers around it exist may attach through a distant path and become slow or unavailable later. Allow five to ten minutes after adding each device for the mesh to update its routing.
The gateway reports its state through one multi-colour RGB LED on the top face.
| Indication | Meaning |
|---|---|
| Green, steady | Fully operational. Connected to the PIERRE system through the cloud. |
| Green, slowly brightening and dimming | Operational, connected to a local broker on site rather than to the cloud. |
| White | Bluetooth commissioning mode. Waiting to be set up from the application. |
| Purple | The gateway has a network connection but has not yet reached the PIERRE system. |
| Yellow | Firmware update in progress. Do not disconnect the power. |
| Red | Shown at start-up, before the gateway has established any connection. |
While the gateway is in commissioning mode and the application asks it to scan for Wi-Fi networks, the LED blinks for about five seconds and then returns to steady.
There is one further state: while an installer is configuring the gateway remotely from the application, it shows a separate colour for as long as that lasts.
Adding Wave devices does not change the LED. The four minute pairing window is shown in the application, not on the gateway.
Once commissioned the gateway runs unattended. It holds the Zigbee network together, passes device traffic to the PIERRE system and needs no routine intervention. Leave it powered. Taking the gateway off power takes the whole wireless installation down with it.
The gateway is updated over the network, not from a file. To check it, go to Menu → Settings → Bridges in the Smart PIERRE application, select the gateway and open the Info tab. The tab shows the device type and the build version. If a newer version is available a blue Update button appears; press it to start.
The status LED turns yellow while the update runs and the gateway restarts when it finishes. Do not disconnect the power during an update. If an update cannot be installed, the gateway returns to the firmware it was running before.
The recessed button on the rear edge has two uses, and neither of them is a factory reset.
The stored configuration is erased from the Smart PIERRE application, not from the device. Put the gateway into commissioning mode by holding the button as you power it up, connect to it from the application, and delete it there.
Clearing the gateway also drops the Zigbee network it coordinates. Every Wave device paired to it has to be paired again afterwards.
| Symptom | Likely cause | What to do |
|---|---|---|
| The LED never turns green | No network, or the gateway cannot reach the PIERRE system | Purple means the network is up but the PIERRE system has not been reached: check the internet connection and any firewall. Red at start-up is normal until the first connection is made. |
| The gateway does not appear in a Bluetooth search | It is already commissioned, so its Bluetooth radio is switched off | Hold the button on the rear edge while connecting the power, then search again. |
| A device does not respond | Out of range, or no router nearby | Add a router, a smart plug or an L and N device, between the gateway and the device. |
| Status or automation is delayed | Poor mesh routing or 2.4 GHz interference | Reposition the router devices, or move the Wi-Fi to channel 1 or 6. |
| A battery device keeps going offline | No router within range, or a flat battery | Add a router within five to ten metres, or replace the battery. |
| Devices drop after a power cut | The mesh was disrupted and is rebuilding | Wait for the network to settle. Power cycling the router devices speeds it up. |
| A new device pairs but works poorly | The mesh has not optimised yet | Wait a few minutes, or add another router nearby. |
| The system is unstable after adding devices | Too many devices connected straight to the gateway | Make sure end devices reach the gateway through router devices instead. |
Not necessarily. A PIERRE display can provide the gateway function. A separate gateway is used where no display is planned, or where the wireless coverage needs a coordinator in a position where no display will be installed.
Yes. Each gateway coordinates its own Zigbee network, and each Wave device is paired to one of them. When adding a device, select the gateway that should manage it.
It needs a network connection to reach the PIERRE system. Where the installation runs against a local broker on site, the LED shows green but brightens and dims slowly rather than staying steady.
Use a dedicated supply that can deliver 5 V at 1 A or more. A port that cannot hold that current will make the gateway unreliable in ways that are hard to diagnose.
They have to be paired again to the new gateway. The Zigbee network belongs to the gateway that created it.
Central and open. Not in a metal cabinet or a distribution board, and not right next to a Wi-Fi router, a microwave oven or a large television.
Over the network. Open Menu → Settings → Bridges in the application, select the gateway and open the Info tab. If an update is available a blue Update button appears there.